Comprehensive Guide to Export Exchange Mailboxes into PST in 3 Ways


Well, exporting Exchange mailboxes to PST is a common practice for organizations and Exchange administrators nowadays. It is because the resultant file can be used by them as a backup copy either in case of data loss or when an employee leaves the organization. Thus, it is extremely useful for users to export a PST file from Exchange Server in various scenarios.
Now comes the point that which is the most suitable option to export mailboxes securely. Overall, there are 3 simple ways to export mailboxes to PST in Exchange.
The first one is by using Outlook and can be performed by any user without an Administrator role. The second method includes the use of Exchange Admin Center which requires Administrator access. Both these procedures will export a single Exchange mailbox at a time.
If you want a smart solution that helps you to export Exchange mailboxes into PST in bulk, then this solution is for you. This smart solution has many advanced features that make the entire process a cakewalk for you.
Solution 1 – Export Mailboxes to PST in Exchange via Microsoft Outlook
This is one of the easiest ways when we talk about exporting a single mailbox at a time without Administrator access. The users just need to have their email account configured in the Outlook application. The Import / Export Wizard in Outlook will help you get the job done.
The steps to carry out the task are discussed below. These steps are for Outlook 2019 / 2016 / 2013:
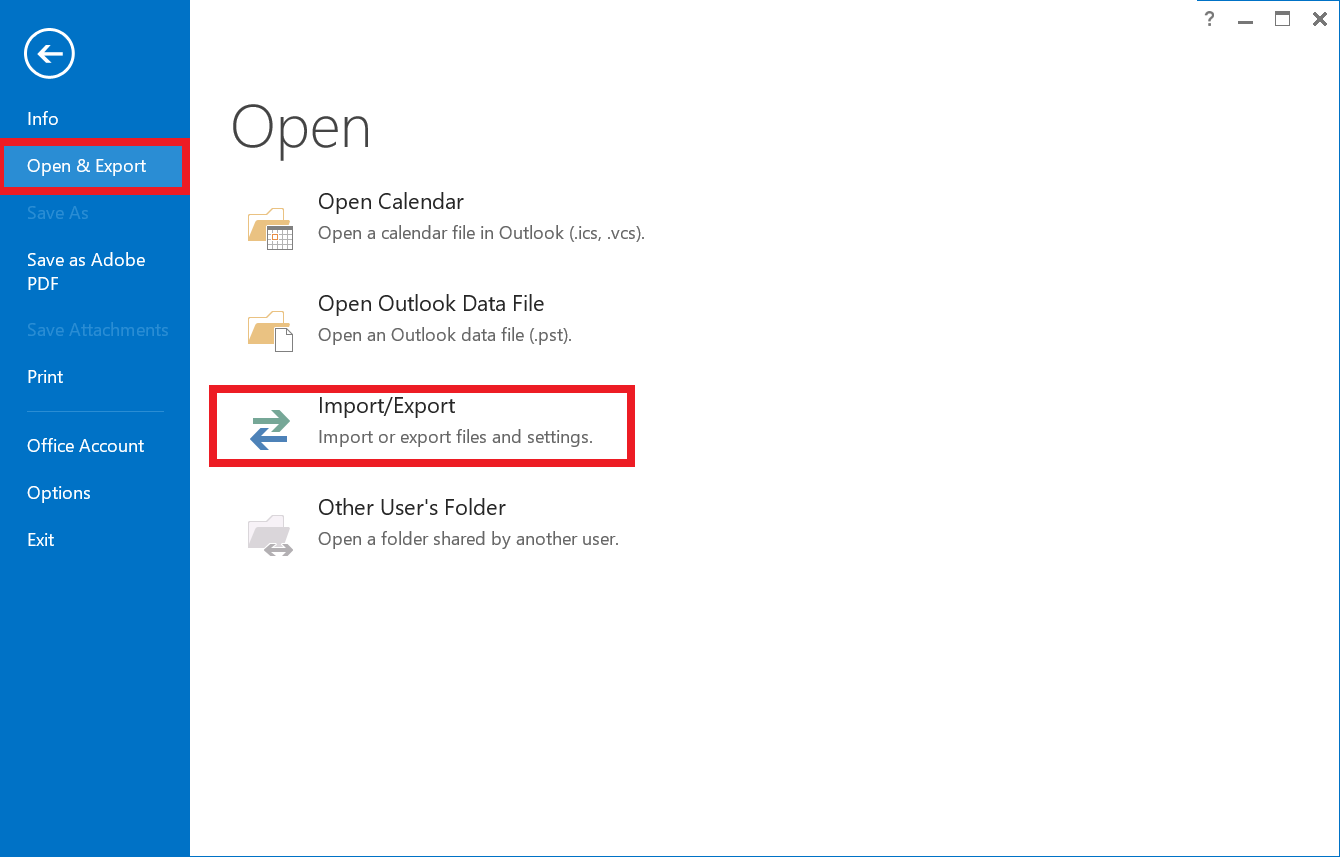
1. Navigate to File menu >> Open & Export >> Import/Export.
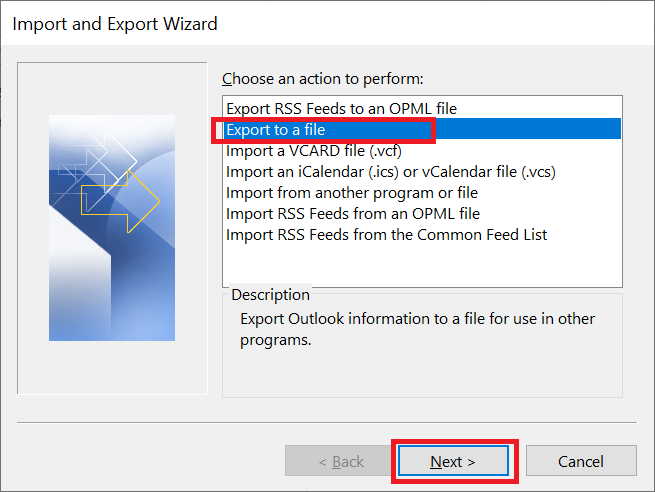
2. Choose the second option from the list i.e., Export to a file.
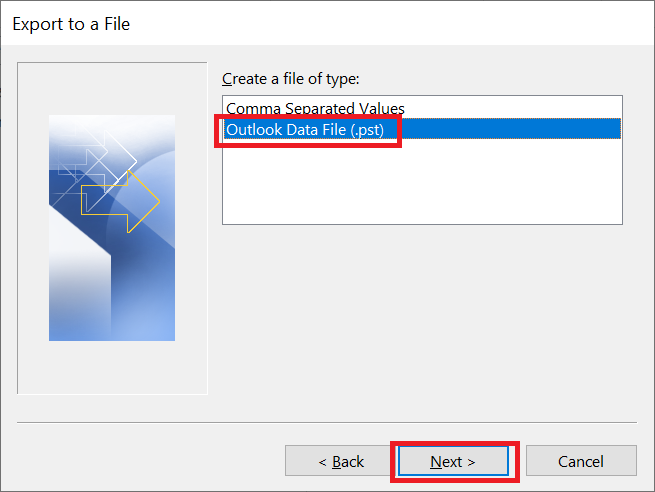
3. Select the Outlook Data File (.pst) option under Export to a file window.
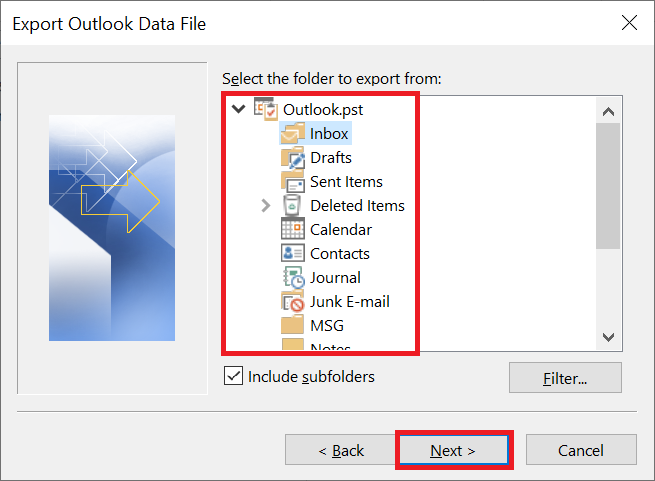
4. Here, you can either choose a specific folder to export or the entire Exchange mailbox.
5. Following that, browse the storage location of data and choose any of the options to manage duplicate items in Outlook.
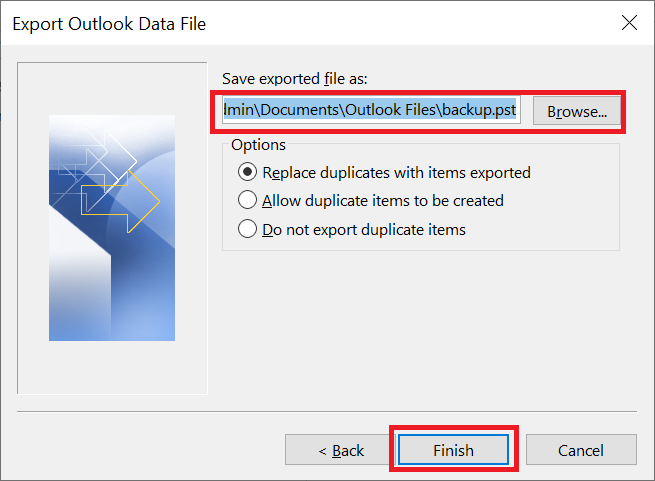
6. At last, click on the Finish button.
Solution 2 – Export Exchange Mailboxes to PST via Exchange Admin Center
There are a few requirements that a user needs to fulfill before implementing this process. These are:
- Create and assign permissions to a shared folder.
- Assign Mailbox Import / Export permission to the mailbox.
Once both of the requirements are fulfilled, you can use the Exchange Admin Center now:
1. Log in to the EAC using the administrator account.
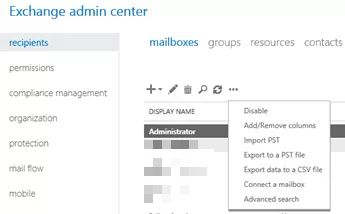
2. After successful login, go to recipients >> mailboxes.
3. Now choose the mailbox that you want to export and click on the 3-horizontal dots.
4. Click on the Export to a PST file option.
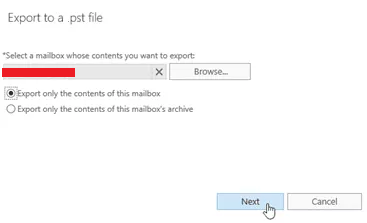
5. This option will open a window where you can select if you want to export only mailbox contents or archive mailbox’s contents.
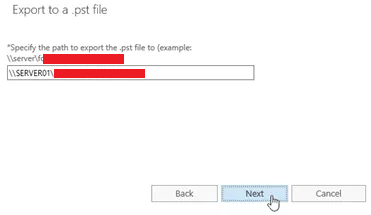
6. Following that, choose the path to export PST from Exchange Server.
7. You can also choose if you want to notify the person when the export process completes.
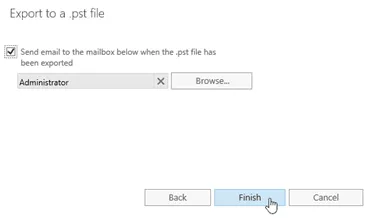
This is also a simple process but exports only one mailbox at a time. If you are having multiple mailboxes, then exporting all of them might take a long time. So, it is suggested to go with the automated tool described below.
Solution 3 – Automated Way to Export Exchange Mailboxes to PST
There are many situations where the Exchange administrators have bulk Exchange mailboxes to be exported into PST format. In these scenarios, both the above procedures are not feasible for administrators. Thus, the only best option for users is to opt for the most reliable Exchange Export Tool.
This smart utility has various advanced features that make the entire job quick and effortless. One such option is the selective export option. Here, users will be allowed to export only specific mailbox categories from the Exchange mailbox.
You can download this application for free and try all the features before buying the licensed version.
Step by Step Guide of this Software
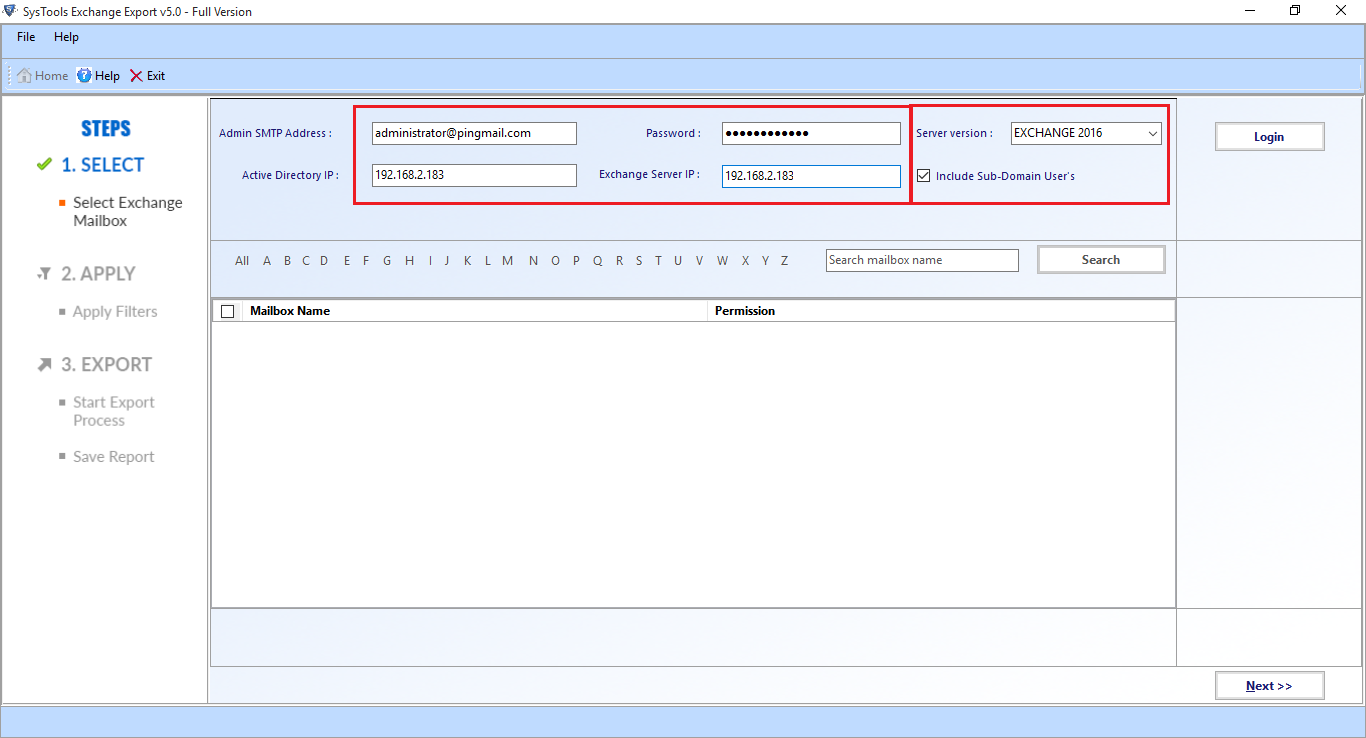
1: Open Software >> Enter the administrator Login credentials, Server version, Active directory IP and Exchange Server IP >> Select Exchange version >> Click on the check box “Include Sub-domain user’s” >> Click on the Login button.
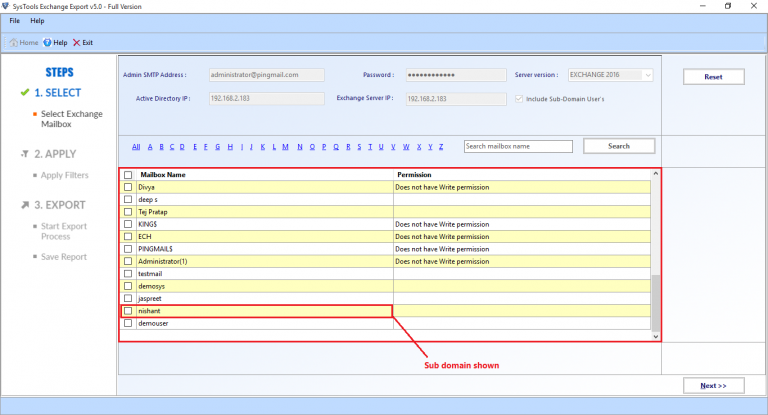
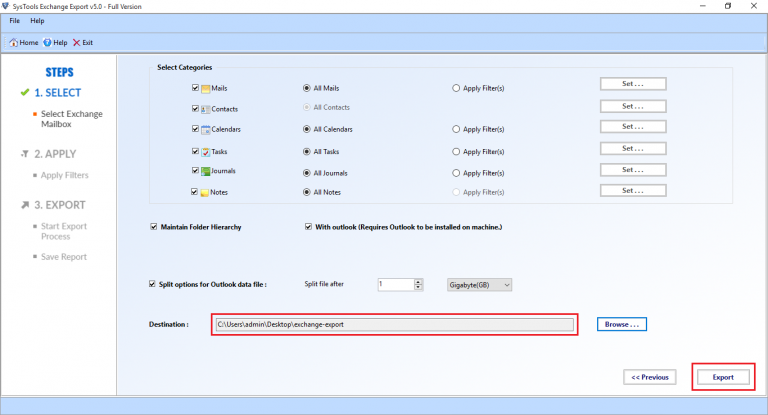
2: Now, If you want to export multiple mailboxes to PST file format in a single instance then, just check the desired mailboxes >> Click on the Next button.
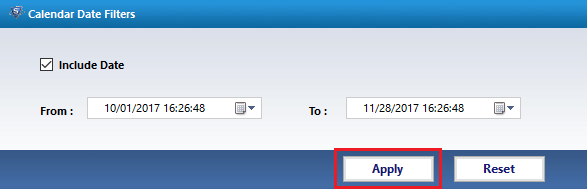
3: Now, you apply Different filters along with sections such as “Mails, Contacts, Calendar, Tasks, News, and Journals”. Use the Set Filter option to use Date Filter to export only specific time period mailbox items.
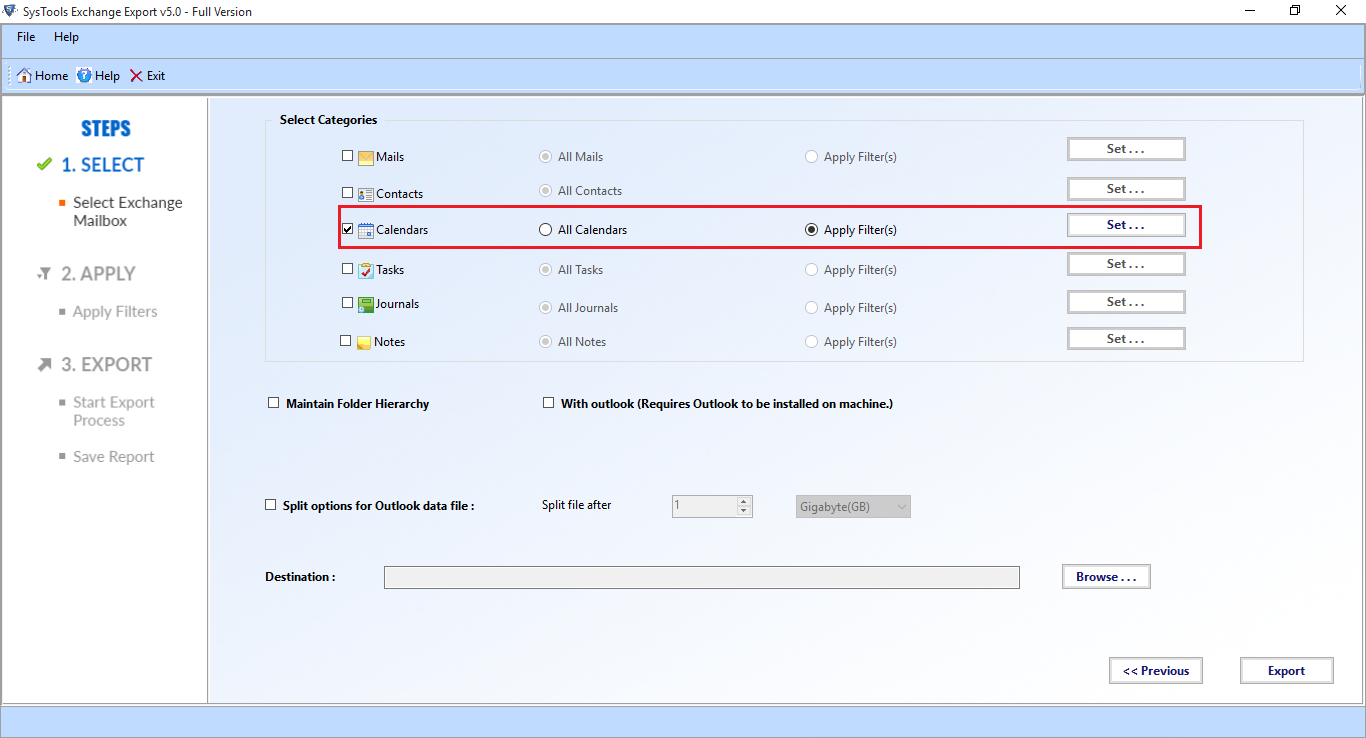
4: In Filters select the Time Interval via “From” and “To” sections.
5: Click on the Browse button to save the destination file path >> Click on the Export button.
Important Note: If any of the users is having an EDB mailbox with them and want to convert it into PST format, the DataHelp EDB to PST Converter Software is the best option for them. This software will let users perform the conversion in just a few clicks. The software’s simple and self-explanatory UI makes the process even more efficient.
Bringing It Altogether
When we talk about exporting Exchange mailbox to PST file, then there are three best options that come to the user’s mind i.e., via Microsoft Outlook, Exchange Admin Center, and the professional solution by experts. Users can also use the PowerShell commands to perform the export process, but it must be implemented by tech experts only. If you ask about the perfect solution, then most of the experts recommended the automated utility only.