How to Transfer OST File to New Computer in a Simple Way


Do you want to migrate the Outlook OST file to a new computer? And looking for a solution on how to import OST to a new computer? If yes, then you are at the right place. Here, we will discuss all the possible ways to move OST file to different location.
Microsoft Outlook stores all its mailbox data in an offline OST file format that allows you to access emails even if you are not online.
But the problem is that you can’t transfer OST files directly to a new computer. However, you can transfer all of your PST files, including your emails, attachments, tasks, calendar, notes, to another device. Keep reading to know the process to transfer Outlook OST file to new computer.
How to Import OST file to New Computer?
Before you proceed to transfer your OST file to some other computer, you first should know the location of your OST file in your system.
Step 1: Locate the Outlook OST file
Follow the steps to find the location of OST files.
- Click on the Start menu or the Windows icon on your system.
- Open the Control Panel on your system.
- Click on the Mail option in the Control Panel.
- A Mail setup dialog box gets to open up, click on the Data Files button.
- Now, an Account Settings window will pop up. Make sure you are on the Data Files tab.
- Select the account to know the OST file location. Trace the location and get your OST files.
- You can also click on the Open File Location tab to go to the folder directly.
Step 2- Make the OST importable into Outlook
Next, you need to convert it to Outlook importable file format. So, here we suggested an automated tool that can easily convert offline files into PST. This OST to PST Converter, it helps to migrate OST emails, contacts, calendars, tasks, journals, notes, into new computer. The tool ensures data integrity and maintains the folder hierarchy throughout the procedure. You can browse an OST file without any file size limitation from Outlook 2019, 2016, 2013, and below versions.
Follow the given steps to transfer Outlook OST file to new computer.
1: Launch the software on your system.
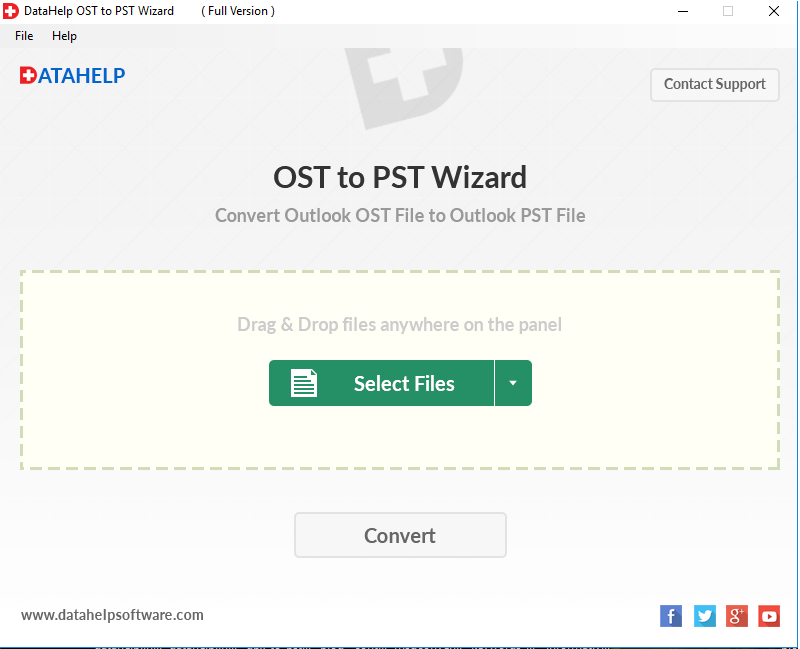
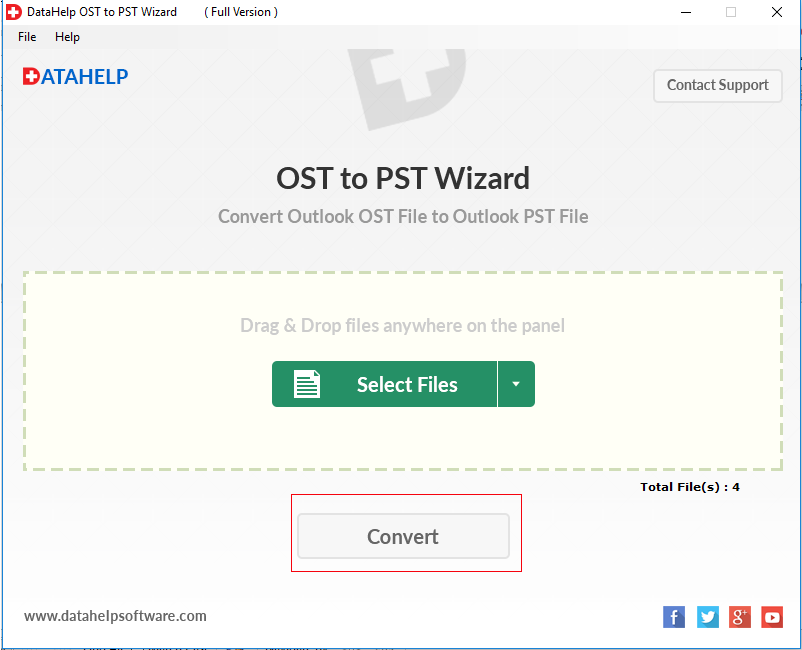
2: Use the Drag & Drop option or select Files options to insert OST files.

3: Click on the Convert button to start the conversion process.
4: Check to Create a Single PST file.
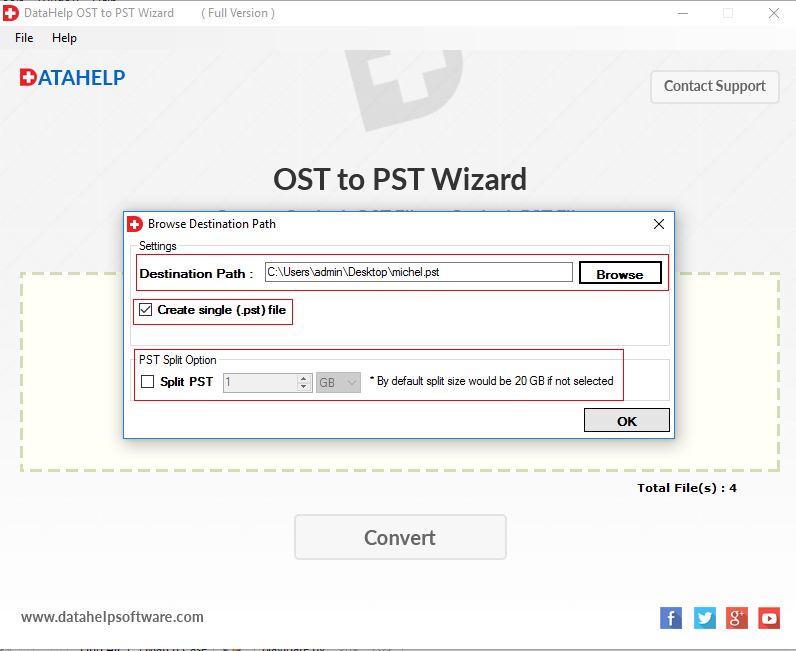
5: Now, click on the Browse button to select the destination location for the resultant file.
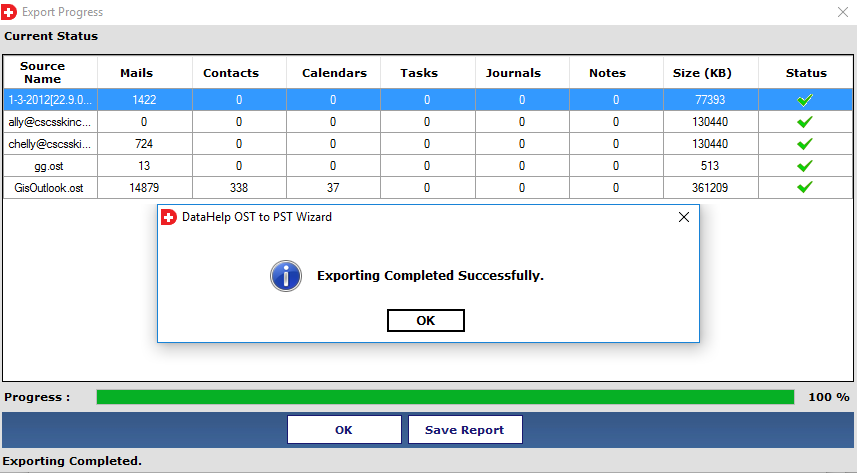
6: The tool successfully exported data into the .pst file.
Now, attach a hard disk or any other external drive to the system and copy the newly created PST to it. You can use this device to transfer your mailbox data to another PC.
Step 3- Create a new Outlook Profile
Once you are have copied the PST on the new system, open Outlook to set up an OST file. Once the profile is configured, proceed to the next step.
Step 4- Import PST to Outlook
At last, import the PST file to Outlook by following the below-mentioned steps:
- Open Outlook and click on File button.
- In the Open & Export category select Import/ Export.
- Use the Import option from another program or file (in Import and Export Wizard) and hit Next.
- Select Outlook Data File (.pst), click Next.
- Browse the file to import & select an option from the available options.
- Finally, click on the Finish button.
By performing all these steps you can easily transfer OST file to a new computer.
Concluding Thoughts
In this blog, we have discussed the procedure on how to import OST file to new computer. Further, we have mentioned the steps to find the OST file location on your system. In order to copy OST file to new computer, you need to convert OST. So, we recommended a reliable tool to perform this task.