How to Move Outlook Data File OST: Top 3 Methods


Summary: Are you looking for a solution on how to move Outlook data file OST? And don’t know how to do it conveniently and easily? Then no need to worry! In this article, we are going to elaborate the methods on how to transfer Outlook data file OST. These methods are explained with step by step instructions that help you change the OST file location easily.
The OST file contains a synchronized copy of your mailbox data such as email, task, contacts, calendars, etc on your local system.
Usually, it’s not vital to relocate the offline storage file used by the Exchange server account. However, if you are running out of disk space because of having a large size of the OST file. Then you can tackle this problem by moving OST to another location.
Read on we will show three impeccable approaches in detail to change Outlook data file OST location.
What are the Methods to Transfer Outlook data file OST?
There are there underline techniques by which you can move Outlook OST files efficiently.
- By using Registry Editor.
- By recreating new OST file.
- By converting OST file.
Method 1: Using ForceOST path registry key
You can change the default location of the OST file irrespective of the versions of Outlook by using the registry editor. To perform the same, follow the steps mentioned below:
1: Open Run command >>Type Regedit in the box and click on the OK button.
2: The Registry Editor will get opened. Now, choose the key according to the version of Outlook.
Outlook 2016: HKEY_CURRENT _USER\Software\Microsoft\Office\16.0\Outlook
Outlook 2013:HKEY_CURRENT_USER\Software\Microsoft\Office\15.0\Outlook
Outlook 2010:HKEY_CURRENT_USER\Software\Microsoft\Office\14.0\Outlook
Outlook 2007:HKEY_CURRENT_USER\Software\Microsoft\Office\12.0\Outlook
3: Click on the empty area on the right-hand side of the registry editor. Click on the New followed by the Expandable string value.
4: Now, click Force OST path. And add a new default location where you want to store the OST.
5: Hit OK to finish the process.
Method 2: Move the OST by Recreating the Account
If you have an existing offline file, you can remove these OST files and recreate the account in the profile. The default location of the OST file has to be known to the user in this method to move OST to another location.
C: \Users\AppData\Local\Microsoft\Outlook
C: \Documents and Settings\Local Settings\Application Data\Microsoft\Outlook
Recreating new OST files through disabling and re-enabling cached mode at a different location cause data migration automatically with the Exchange Server. Follow the instructions as given below:
1: Open File>>Account Settings >>Click on Data File tab.
2: Select the Exchange account and click on the Settings option.
3: Now, move to the Advanced tab, deselect “Use Cached Exchange Mode” and hit OK.
4: Click on the “Outlook Data File Settings” option and click on the “Disable Offline Use” option. Confirm it by clicking on Yes.
5: Now, select Outlook Data File Settings and choose either “I want to create a file (default)” or “I want to move the old file” option.
In the first option, browse the folder path where you want to save the new OST file, and in the second option, browse the OST file path which you had moved to a new location.
Here, we are going with the first option. After adding the folder location, click on Open. Click on OK
6: Again go to Advanced tab, select the checkbox “Use Cached Exchange Mode”, hit OK.
7: A prompt message will appear asking to restart the Outlook application. Click OK.
The new OST file will be created at the newly specified location on the system. You can delete the old OST files from the previous location.
Method 3: Conversion of OST File
If you want to move Outlook data file OST to another location, then first you need to convert your mailbox data into PST file format. However, there are some manual ways for converting OST files, but manual methods is not reliable to perfom this task. So we would like to suggest you OST to PST converter.
The OST to PST converter is a secure and reliable to export data from OST. It helps users to extract emails, contacts, calendars, tasks, etc. items from OST file & save into PST file format.
It is a perfect option to use when your Exchange Server got crashed and you get the need to migrate their Microsoft Exchange Server data immediately.
Then, with the help of this tool, you can securely move your OST file. If the OST file are huge then there are the chances of data loss by using manual methods. Hence, you can use this utility to move large OST files from one location to another.
For this, you just need to export .ost file data to Outlook importable format & then you can import that personal folder files into any other system.

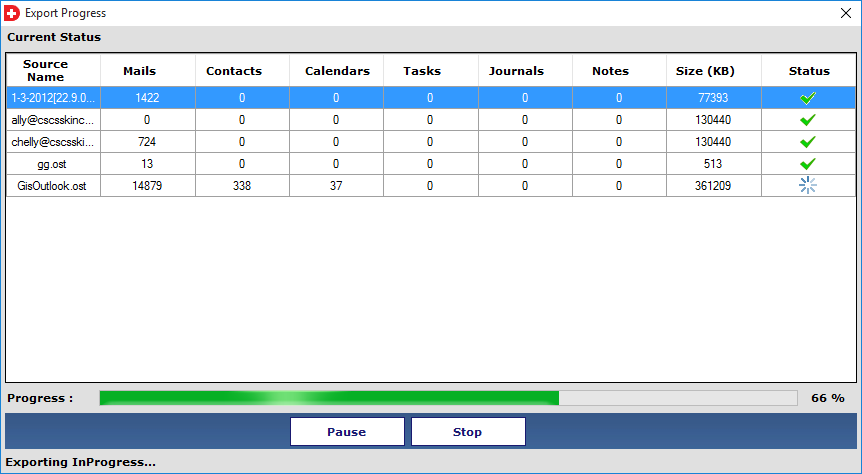
Follow the Steps to Convert OST Files to Outlook Importable File
Step 1: Run the tool to convert the OST data to PST file.
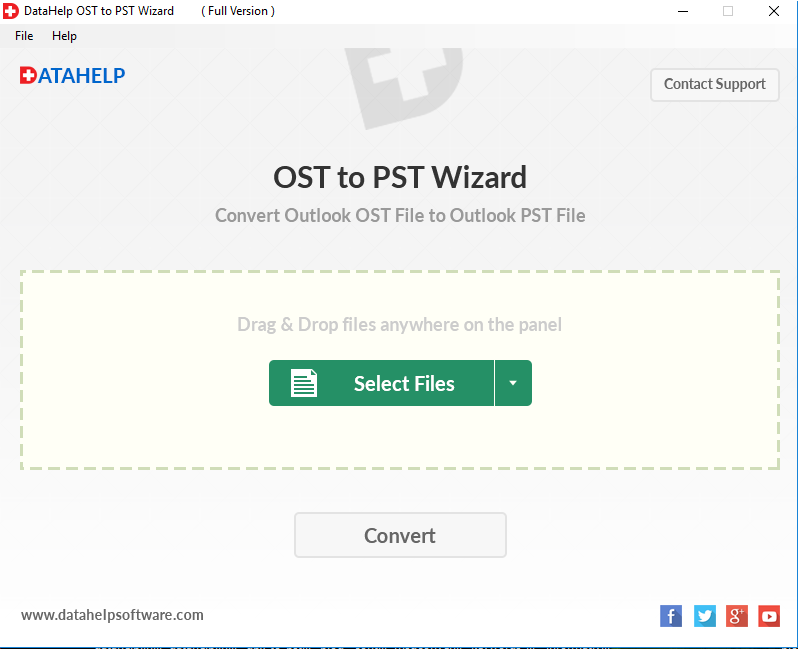
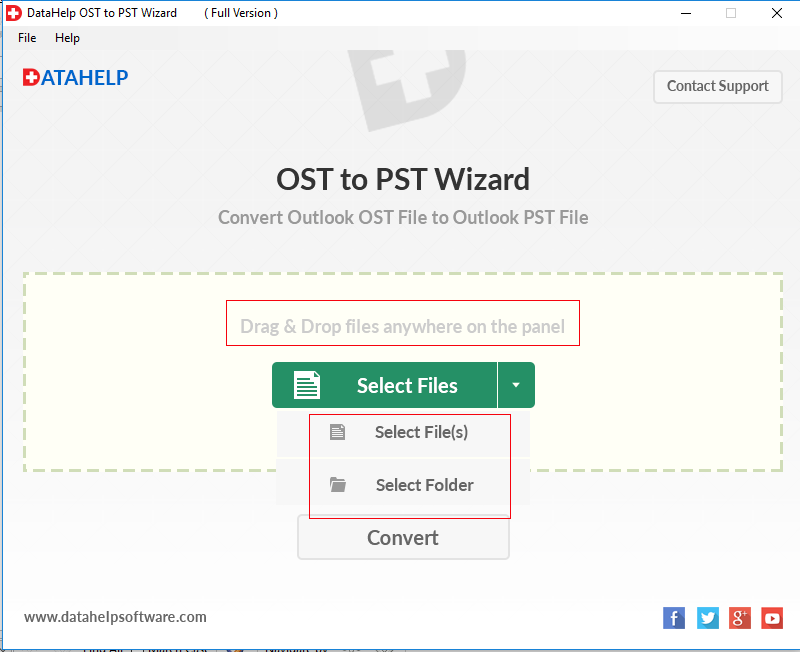
Step 2: Choose Drag & Drop or Select File option to insert the .ost file from the local system.
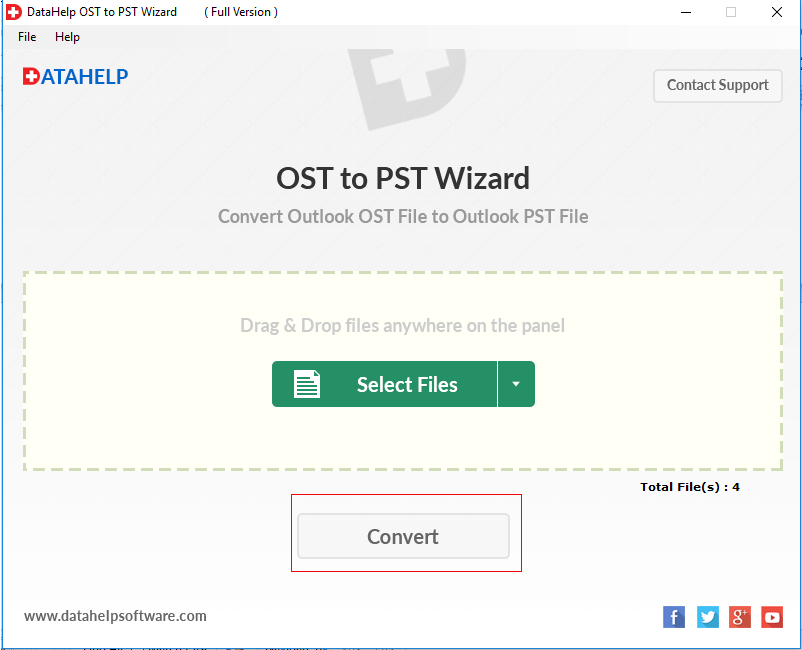
Step 3: Click on the Convert button to start the conversion process of OST files.
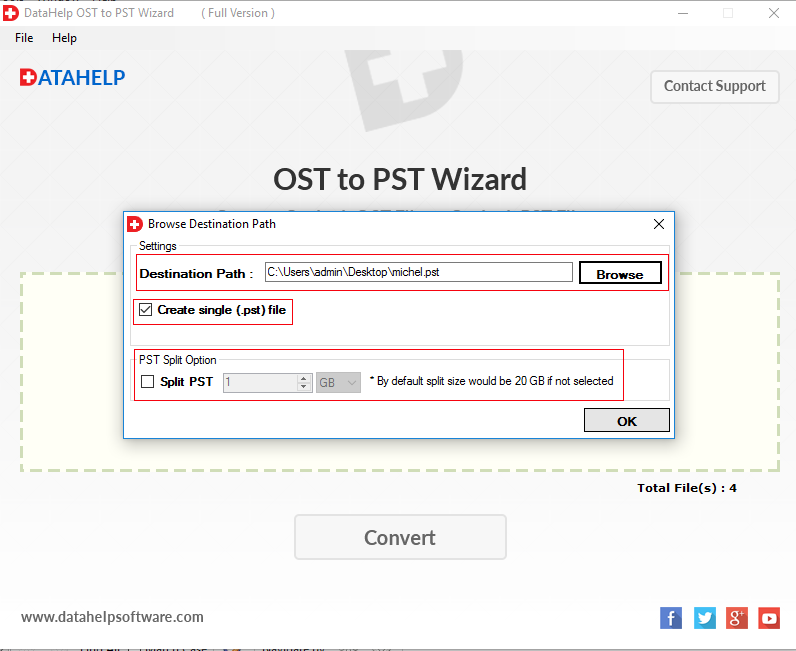
Step 4: Now, browse the location where you want to save converted files.
Step 5: Now tool successfully exported all data of OST. Click OK.
Conclusion
By reading the article you will get the complete knowledge on how to move Outlook data file OST from MS Outlook 2019, 2016, 2013, 2010, 2007, 2003.
We have mentioned some methods to transfer the OST files that can be done manually. But these manual approaches has certain limitations while moving OST to another location.
So, we recommended the third party application which is the secure and reliable way to move Outlook data file OST.