Move from One Office 365 Tenant to another – Information You Need to Know


Migrate from one O 365 tenant to another O365 need is often rising because of Merge & acquisitions of organizations. If you are thinking to initiate the process or you are needed to migrate from organization Office 365 to another Office 365, so, you are visiting in the right place here you will get the right solution.
We know this migration is complicated but, it isn’t as complicated as it seems. We can easily perform this cloud to cloud migration with an automated migration tool. In this article, you will get everything that you know to move from one Office 365 tenant to another Office 365.
Why Migrate from One Office 365 Tenant to another?
Microsoft Office 365 is a very popular cloud-based technology at the current time, almost every organization using it for a long time.
In business scenarios, companies acquire other companies or merge with others. As a result of this, we saw there are many companies are searching for a solution to migrate from one O365 tenant to another.
Migration need will be in both scenarios when the company acquired by other company or company divests from other company.
In acquired scenarios, they want to move their data to easily manage multiple users from single organization tenant.
In divests scenarios, they need to migrate their users, domain, and other data into their own new tenant.
You might be thinking, both source and destination tenants are the same platforms (Office 365), so why Microsoft does not provide a solution to migrate one Office 365 to another Office 365. You have to understand this procedure is much complicated from Microsoft end. That’s why Microsoft suggests using a third-party migration tool to do this task.
Best Approach to Move from One Office 365 Tenant to another?
As we know to do this migration we have to use an automated tool, so here we introduce Office 365 to Office 365 migration tool. As per expert suggestion, this tool is the best solution to migrate from one Office 365 tenant to another Office 365. Get to know highlighted features of the tool –
- Migrate entire mailbox data from One Office 365 to another.
- Support migration of Emails, Contacts, Calendars, and Documents.
- Concurrent migration facility to migrate multiple users concurrently.
- Pause & resume migration process facility.
- Date filter facility for emails, contacts, calendars, documents.
- & Source users mapping facility.
- Support migration of Office 365 tenant & domain users.
- Delta migration facility to migrate new items.
- Support account-based priority migration.
Let’s migrate from One Office 365 tenant to another Office 365, but first, we have to know some prerequisites of software.
Download Software –

Pre-requisites of Software –
Before starting the migration, we have to fulfill following pre-requisites of software –
1 – Register application in Microsoft Azure, enable permissions, and generate Application ID.
2 – Prepare both source & destination Office 365 tenant.
3 – Enable Application impersonation privilege.
4 – Activate migration software to migrate all data from one Office 365 tenant to another.
Steps to Migrate from One Office 365 Tenant to another Office 365
Let’s have a look at the working procedure of the tool
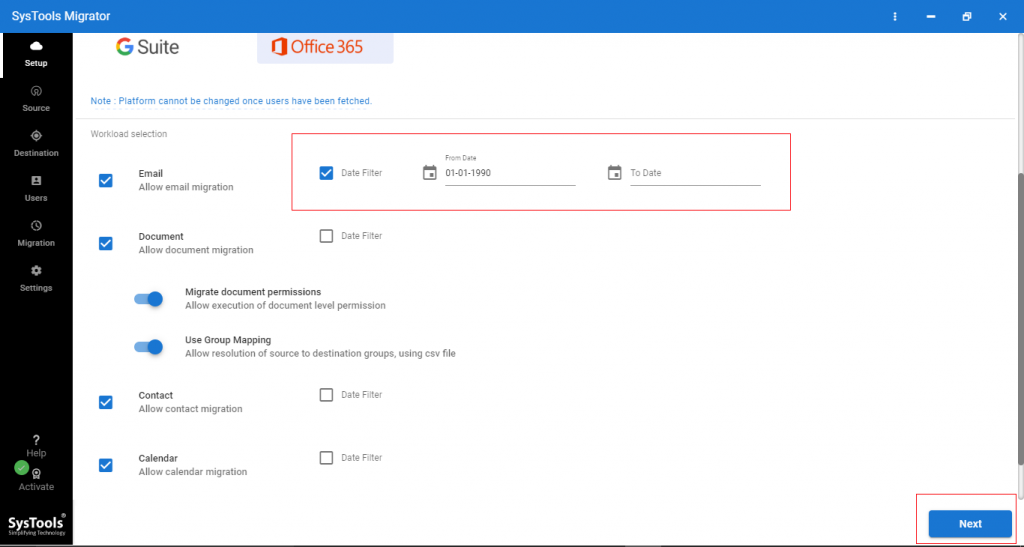
- After installing software, select Office 365 as a source and as the destination in the initial screen.
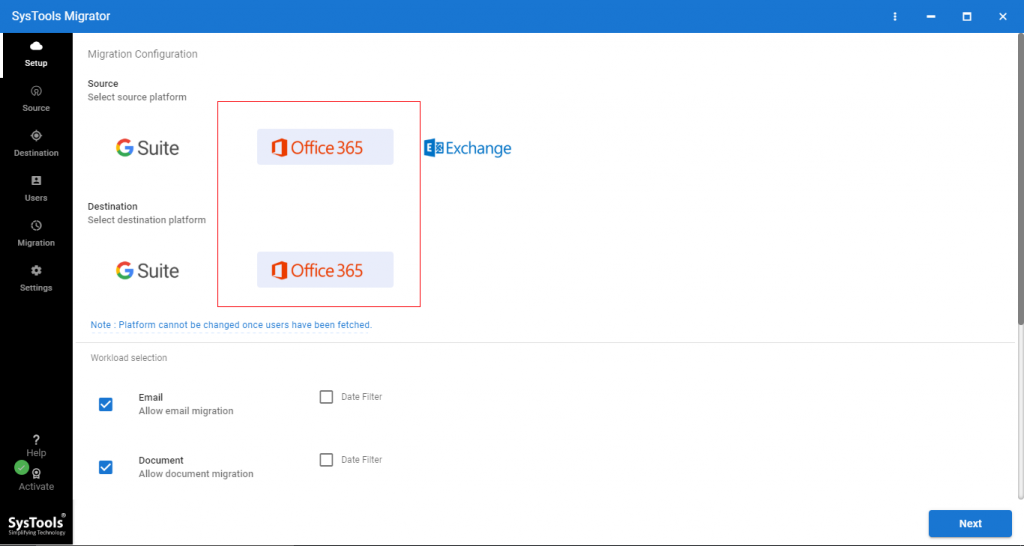
- Select items that you want to migrate to another Office 365 tenant.
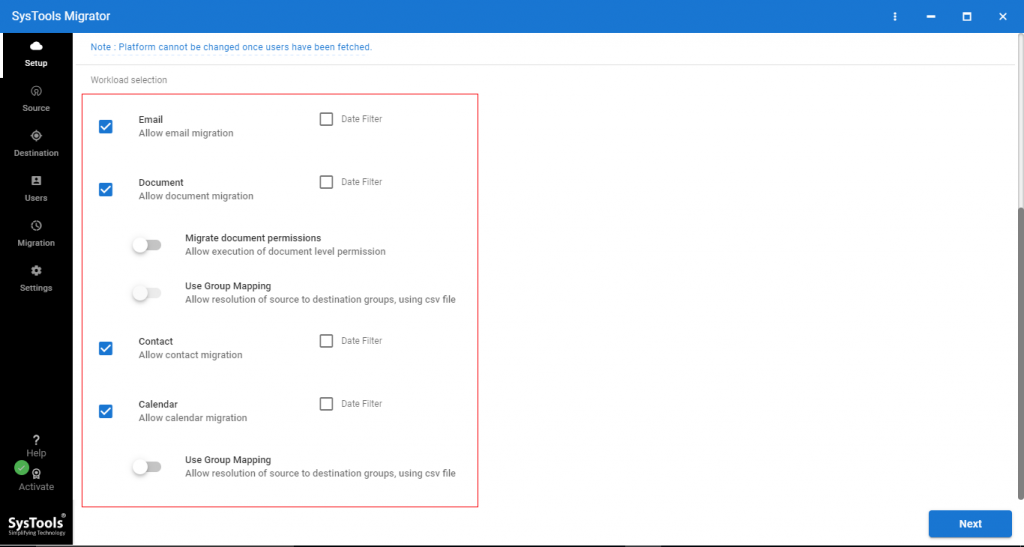
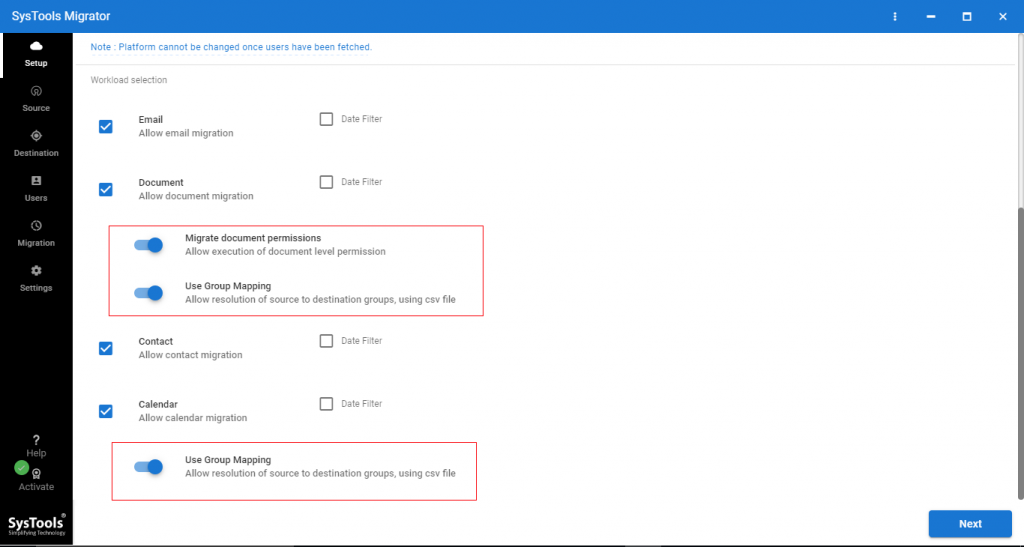
- There are two options available here – Migrate document permissions, Use Group Mapping. Enable acceding to requirements.
- You can also apply Date based filter to Move selected data from one Office 365 tenant to another.
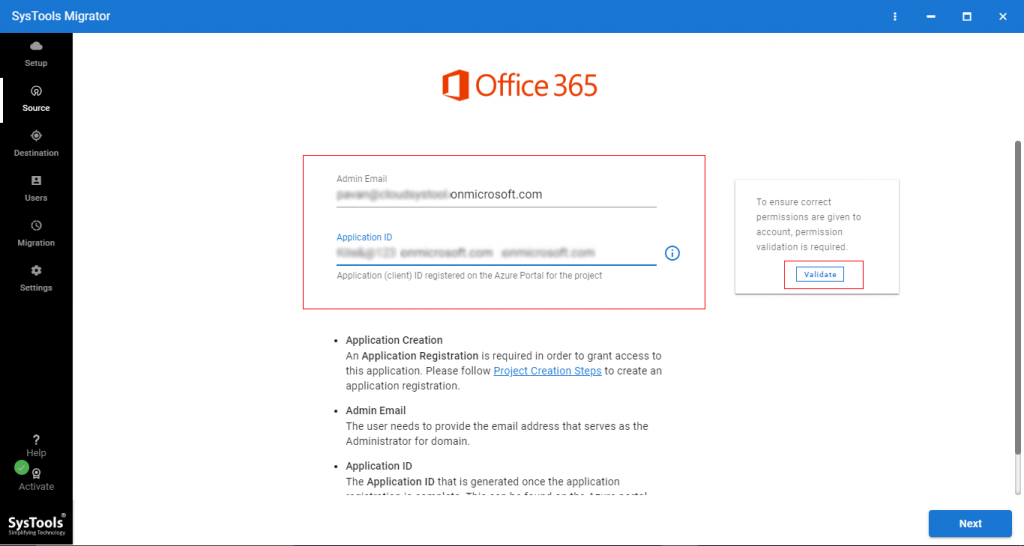
- Now, login Office 365 source tenant with the Application ID and Admin ID. Then click on the Validate permission button. Then click on Next.
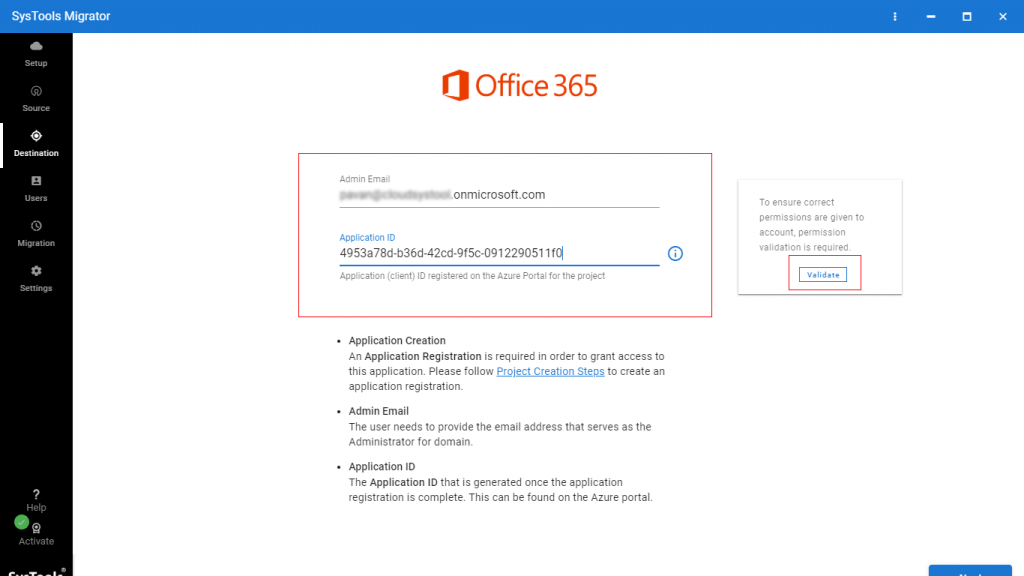
- Login Office 365 destination tenant where you want to move data. Click on the validate button. Click Next.
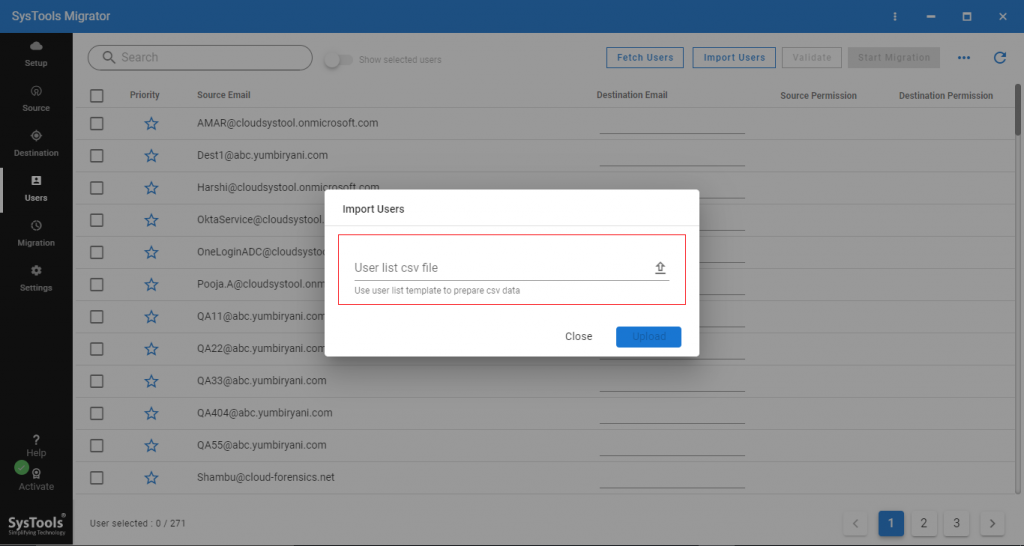
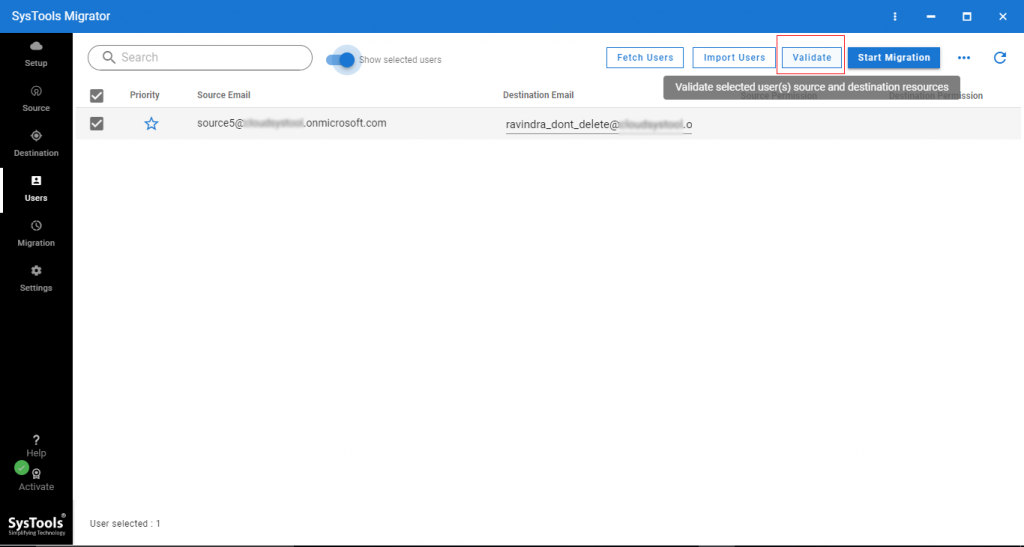
- Now, here tool provides three options fetch users, import users, download template.
Select import users to import CSV mapping file in which we have to maintain source & destination user’s email IDs. Browse CSV file and click upload.
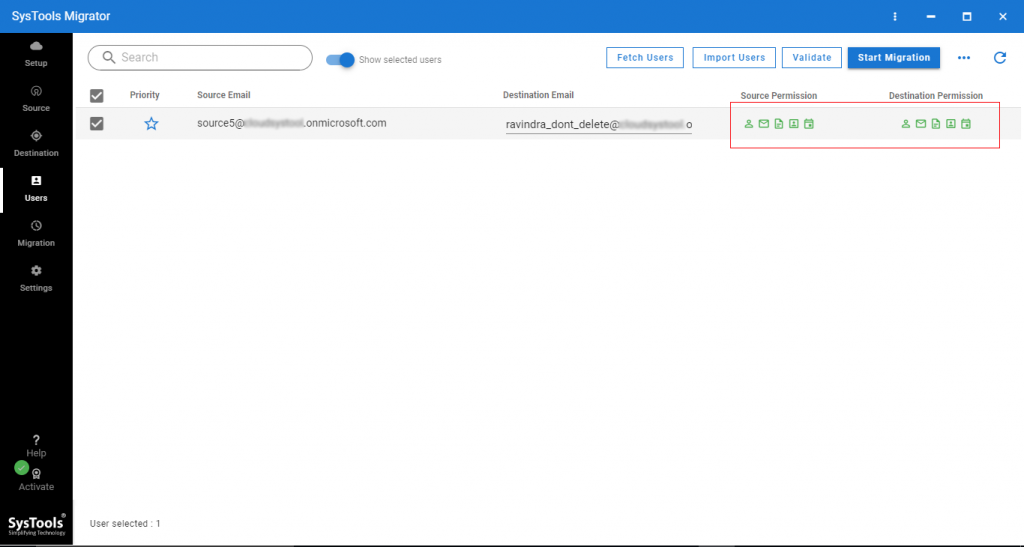
- After importing users, we have to validate permission. Click on Validate.
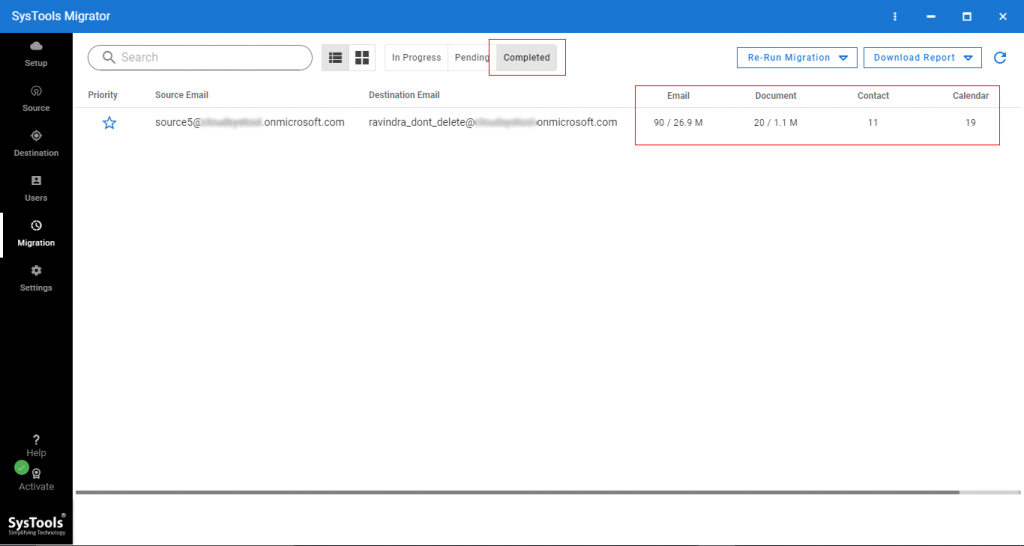
- Now, permissions are validated. Now time to move one Office 365 tenant to another. Click on Start migration.
- Migration completed.