Save Outlook Emails to Hard Drive – Various Queries Answered in Perfect Ways


This blog explains various methods to save Outlook emails to hard drive along with the reasons for which you might want to do so. Everybody knows Outlook creates two files to store the data; OST file and PST file. We will show the workarounds to create these files so that you can easily export them in your external as well as internal hard drive.
But before that, let’s take a look at a user query as an example of many users’ situations.
User Query – I have been using Outlook since a long time and never have encountered anything like losing the data or corruption in my files making me to backup emails from Outlook to hard drive. The other day, my Outlook stopped running and I got pretty scared as there’s a lot of data in my mailbox. The technician said that it is because of malware attach and that I should take a backup of my emails and save it on my hard drive. Is there any solution that can help me with it? Please suggest!
There are many users who are in similar situations as above. This is why, we are writing this blog to help users with the perfect solutions to move their messages to hard drive. Let’s first check out the reasons to take a backup of their data.
Why Would Users Save Outlook Emails to Hard Drive?
Find the reasons why people would want to take a backup of their data:
1. It is important that you take a backup of all your data as it is not certain what may happen to it. As all the data is valuable, nobody wants any loss, deletion, or theft of their data which is why it is always suggested to have a backup to keep it safe.
2. Sometimes, you might need to save the emails in HDD to share them in bulk with recipients. Once you have your emails in your HDD, you can easily transfer these to the person/people you want.
3. There are cases where one might need to move their data from one system to another one. This can also cause users to save the data to their hard drive for migration.
Which Method is the Best to Backup Emails from Outlook to Hard Drive?
As we all know that when IMAP is configured to Outlook, an OST file is created which is the Offline Storage Table file of Outlook. OST being an offline file, it is inaccessible. This could become a problem for most of the users.
Now, what you can do in such a situation is that you can covert this file into the other Outlook supported file i.e. PST. Once you create a PST file, you can easily export it to your hard drive. But how can one make the conversion happen?
Make use of the OST to PST Conversion Tool and learn how it works to save Outlook emails to hard drive. Follow the steps as mentioned below to start the conversion process:
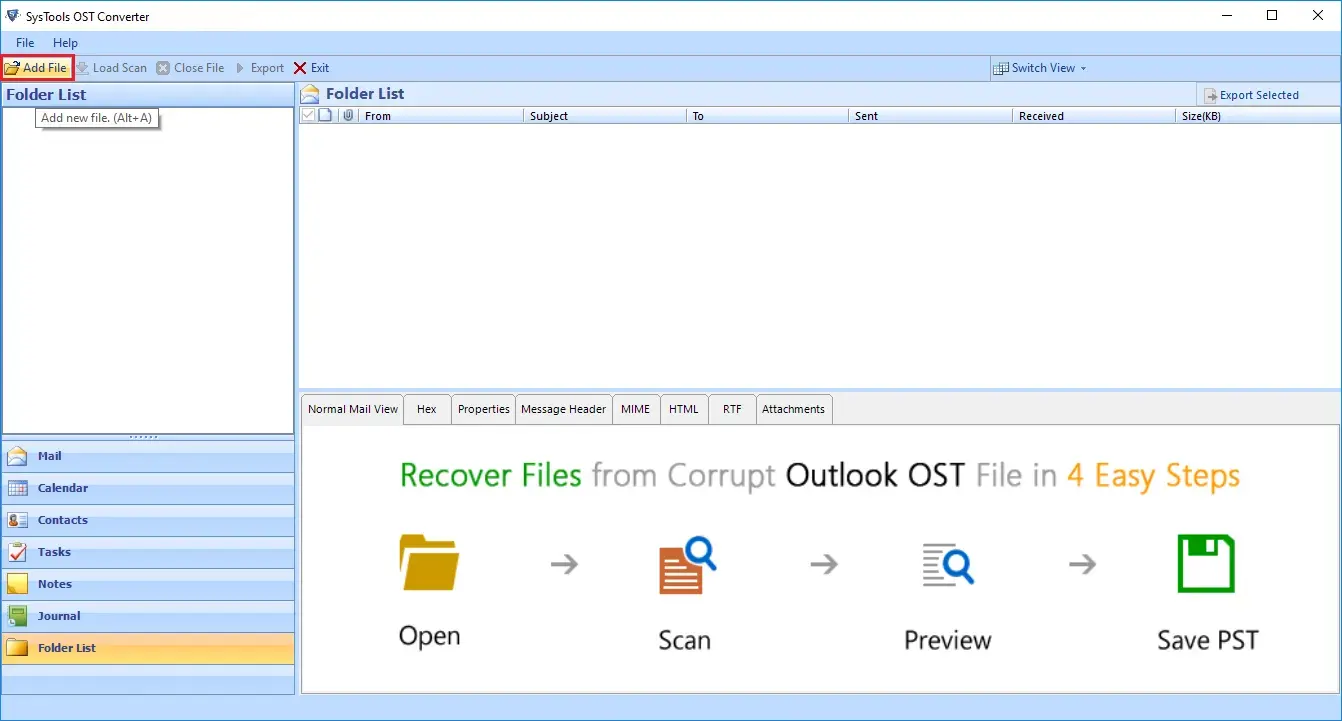
1. Download the wizard and install it on your system. Choose the Add File button.
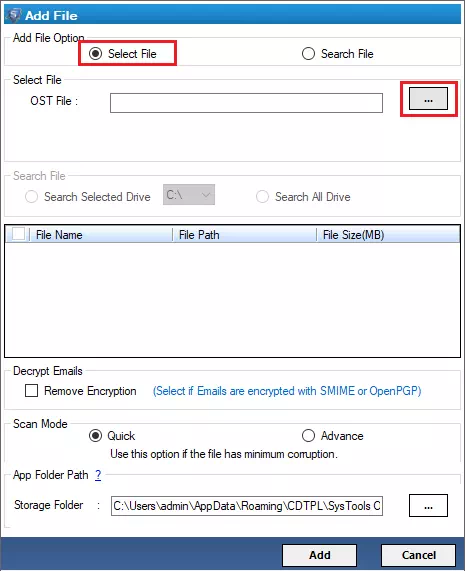
2. Mark the Select File option and click on the … button to browse for the OST file you want to convert.
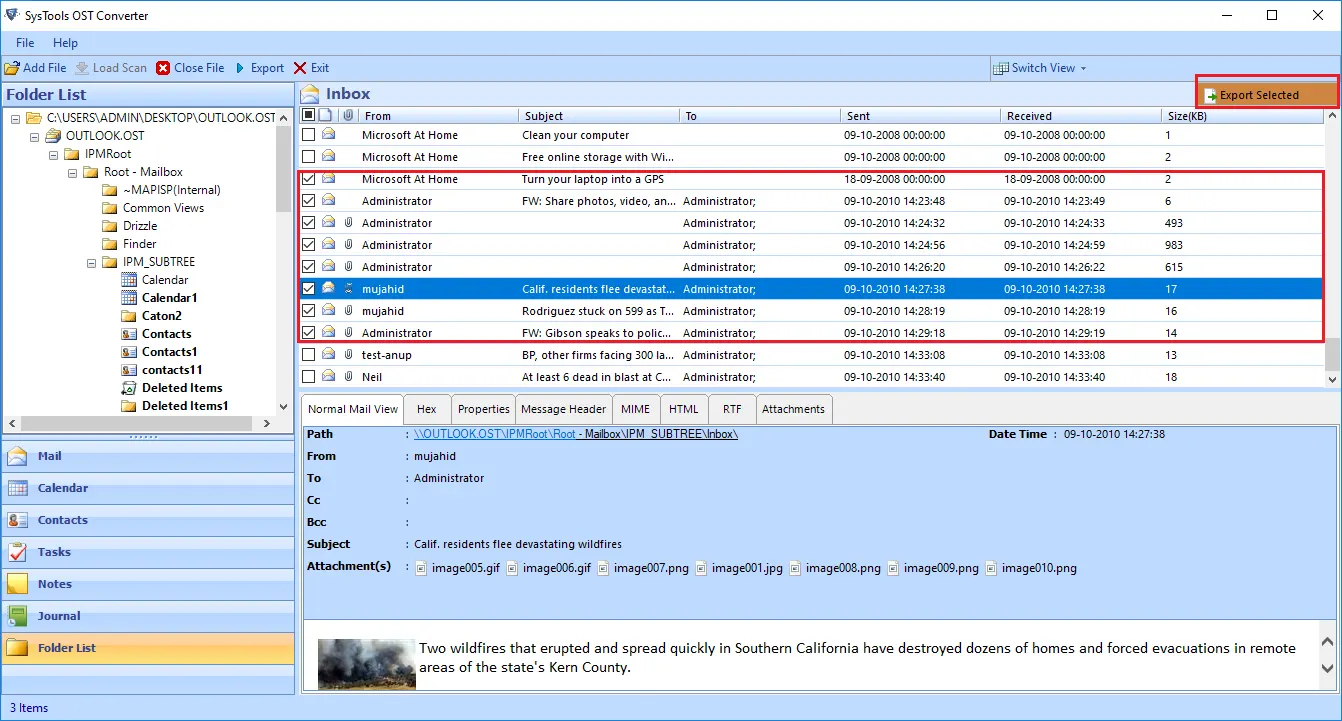
3. Choose the Advance Scan mode and preview the data. Click on the Export Selected button.
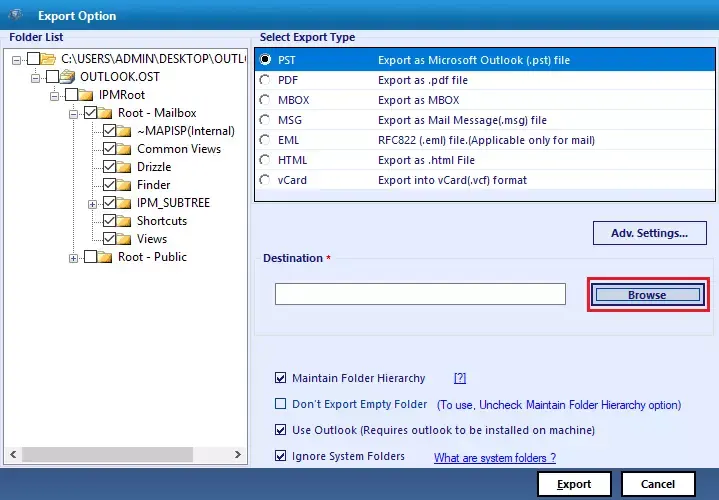
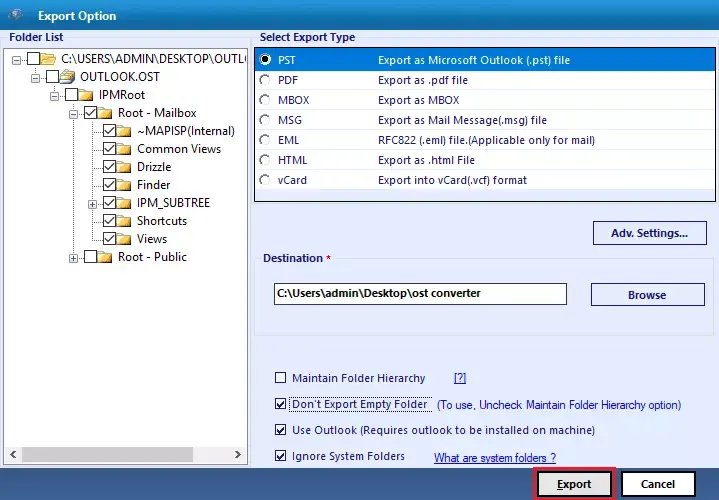
4. Now, select PST as the export type and set the Advance Settings as per your requirement.
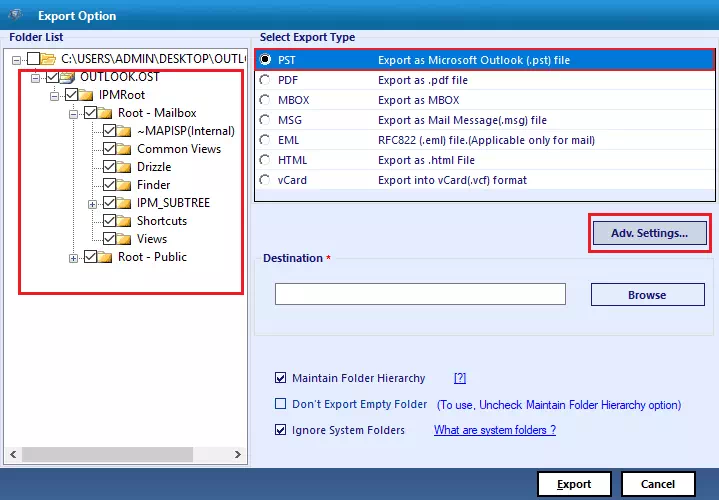
5. Click on the Browse button to pick a destination path for the end result. Select Make New Folder option and hit OK.
6. Finally, hit the Export button to end the process of conversion.
Once you have completed the conversion procedure, you can transfer the resultant files to your hard drive.
How Can One Backup Emails from Outlook to Hard Drive Manually?
This is another method to save your emails in your HDD. This method makes use of the Import/Export Wizard of Outlook to export the emails.
Let’s have a look at the steps for the same:
1. Launch Outlook on your desktop and log in to your account.
2. Choose the File tab and select Open and Export option.
3. Click on the Import/Export option and the Import and Export Wizard will open on your screen.
4. Select the Export to a file option and hit Next for moving forward.
5. After that, click on the Outlook Data File (.pst) option and press Next.
6. Connect the hard drive to your system and click on the Browse button for the end location of the file.
7. Enter a name for the file and hit OK.
Let’s now understand how POP configuration works and helps in saving the data.
Working Steps to Save Outlook Emails to Hard Drive
For this method, you have to copy the data from the default location and move it to any HDD; internal or external. Check out how:
1. Navigate to the default location of the files saved in Outlook. Open Outlook and choose the File tab. Click on the Account Settings option.
2. Choose the Data File option to know where the Outlook data file is located.
3. Browse to the location, copy the data file, and paste it in either of the HDD storage.
Final Words
It is important that you always have a backup of your data as it is not wise to be carefree and not beware of the risks that surround your data. This is why, experts suggest users to save Outlook emails to hard drive to keep them safe from all the risk of data loss, corruption, theft, etc. As mentioned above, IMAP configuration with Outlook creates an OST file which is not accessible in other systems. For that, you need to convert it to the other Outlook file (.pst) to make it accessible.
Go through all the methods and choose the one preferable to your situation. The software will help make the process easy, quick, and secure with bulk exportation. Manual may take some time while converting the data for you.