Do You Know How to Import Mac Outlook to Windows Outlook?


Summary: Trying to import Mac Outlook to Windows Outlook? If yes, then you are at the right place because here, we are going to discuss it in detail.
Requirements do change according to time and technology advancements, people make up their minds to move from one platform to another.
The same concept works for email clients too. The users frequently switch from one email client to another due to their requirements.
Nowadays, many people are importing Mac Outlook into Windows Outlook. Most people search for a simple yet reliable way to migrate Mac Outlook 2011, 2016, 2019 to Windows Outlook 2019, 2016, 2013, 2010, 2007, 2003.
Thus, in this blog, we are going to introduce different methods using which the user can easily perform Mac Outlook files conversion to Windows Outlook migration in a hassle-free way.
Why Users Migrate From Mac Outlook to Windows Outlook?
There can be multiple reasons behind the migration from Mac Outlook 2011, 2016, 2019 to Windows Outlook. However, these reasons depend on individual and organizational requirements.
- A person switching from the Mac Operating system to the Windows Operating system.
- Migrating Mac Outlook 2011 to Windows Outlook 2016 due to the company’s requirements.
- Need to access Mac Outlook data on Windows Outlook.
Selecting an email client among numerous email clients is a very challenging task.
However, Outlook is the first choice of users due to its bundles of features. With Outlook, one can easily manage all the email, calendars, contacts, tasks, notes, etc. in an efficient way with other benefits also.
Methods for Importing Mac Outlook Data into Windows Email Client
Most people still are in a dilemma that Windows Outlook is better than Mac Outlook or not. Now, the answer to this question Yes, Windows Outlook is better in every way than Mac Outlook. Moreover, it provides more advanced features as compared to Outlook for Mac.
In this section, we are going to explain the step-by-step process to convert Outlook for Mac files to Windows Outlook.
Method 1: Conversion of Mac Outlook to Windows Outlook Manually
The method is divided into 3-steps, the user has to follow each step correctly to avoid issues.
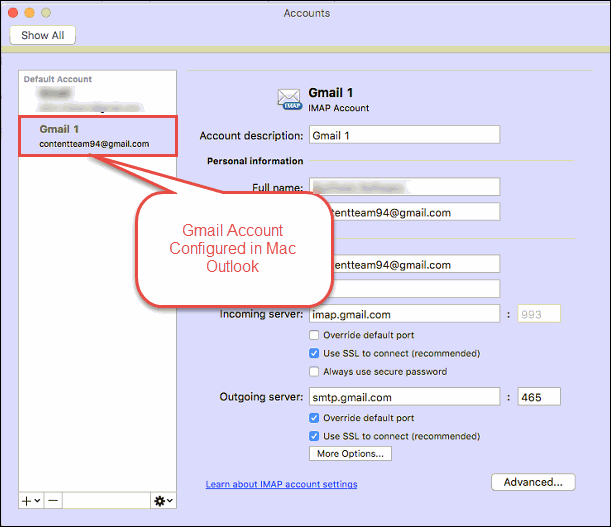
Step 1: Configure Gmail In Mac Outlook
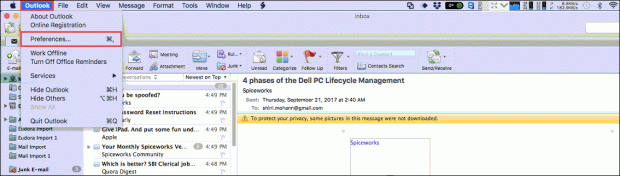
1: Open Mac Outlook > Outlook > Preferences
Note: To perform this step, the user must have the credentials of Gmail account with IMAP configuration.
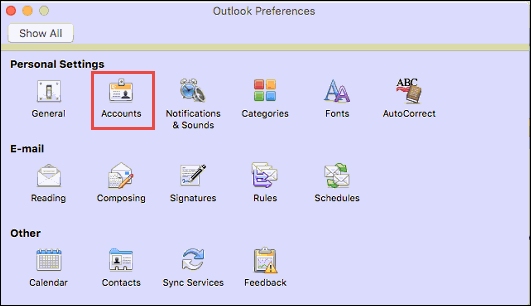
2: In the Personal Settings option, you need to select the Accounts option.
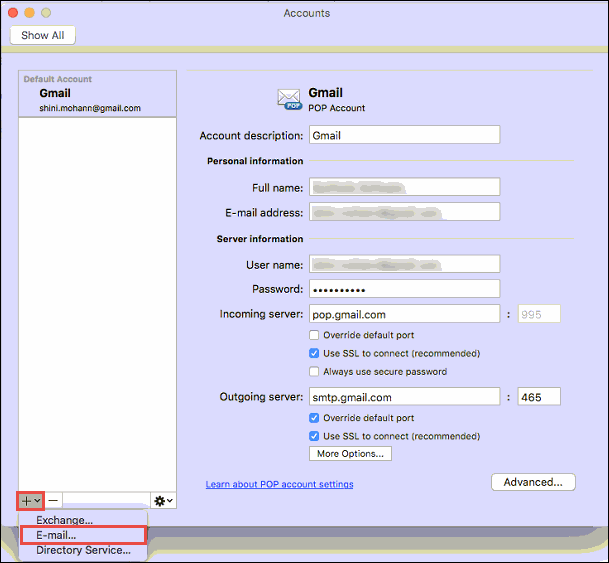
3: Now, click on the + icon at the bottom of the screen and choose the Email option.
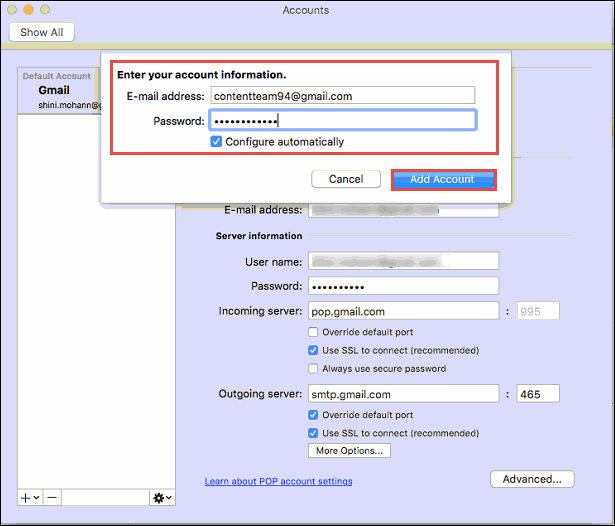
4: After that, you have to enter Gmail account username and password and click on Add Account button
5: Your Gmail account will be added to your Mac Outlook profile successfully.
Step 2: Export Mac Outlook Data to Gmail
The next step in the process to import Mac Outlook to Windows Outlook is to migrate data from the source to the said platform using the following methods:
1: Open Mac Outlook and right-click on the configured email account folder. Select the New Folder option.
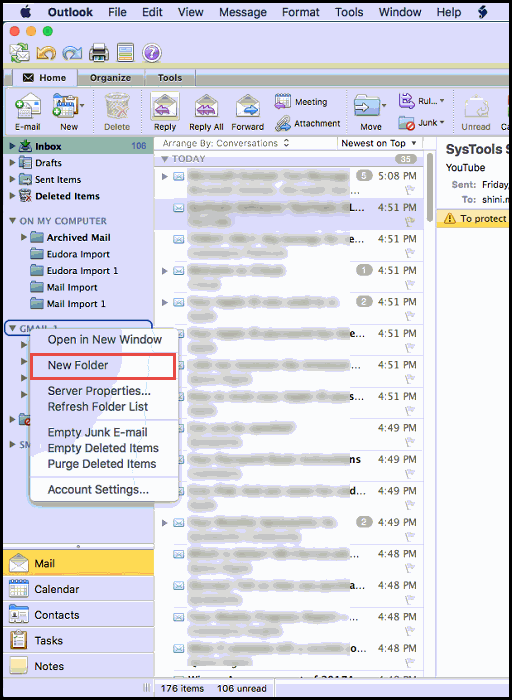
2: Name the New Folder and then click on File > Import.
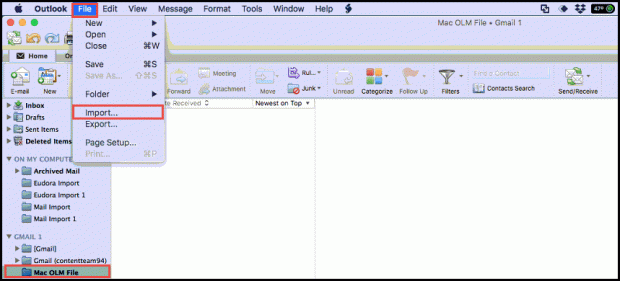
3: Now, the Import Wizard will open. Select Outlook Data File option and click Next.
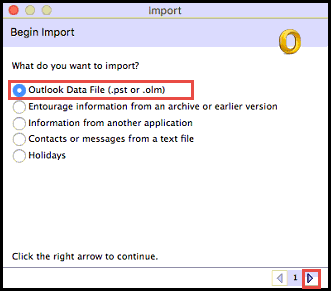
4: After that, select Outlook for Mac Data File (.olm) option.
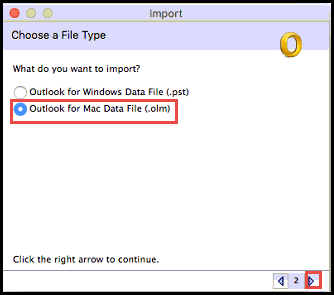
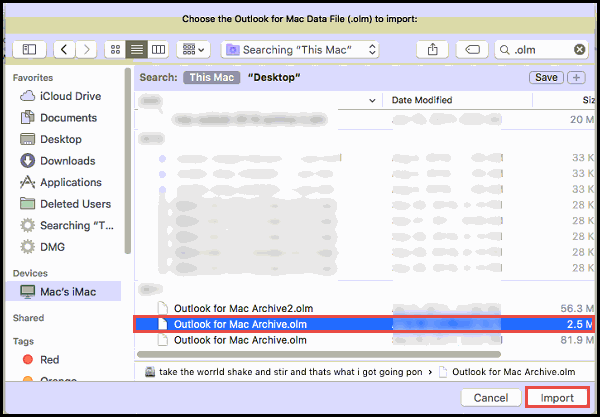
5: Select the OLM file created in Step 1 and click on the Import option.
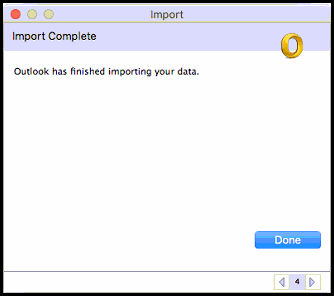
6: After the completion of the Import process, you will get an Import Complete notification.
7: Now, on the Mac Outlook screen, you will see all the imported messages. Select all the messages and right-click on them.
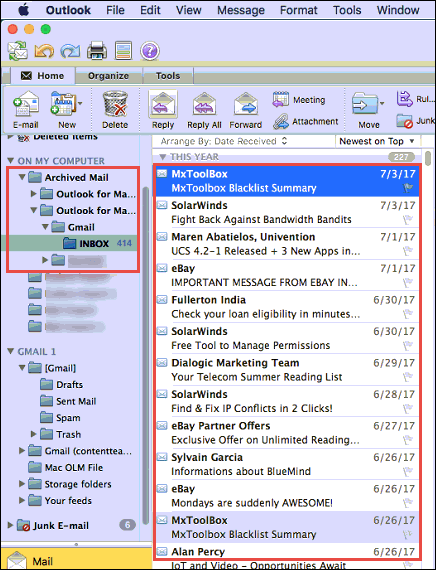
7: Select the Move and Choose Folder option. You need to find out and select the folder used in Step 2 and click on the Move option
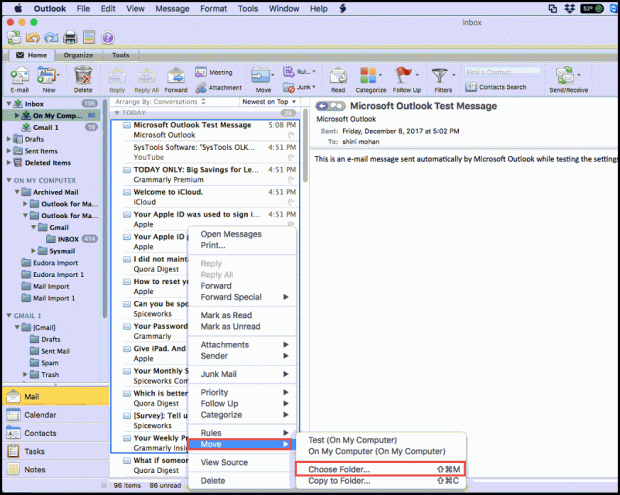
8: Now, all the emails selected will be moved to the configured Gmail account
Step 3: Configure Same Gmail ID in Windows Outlook
Finally, you have to open the Gmail account on your Windows system and open Outlook. After that, you need to configure the same Gmail account in Windows Outlook.
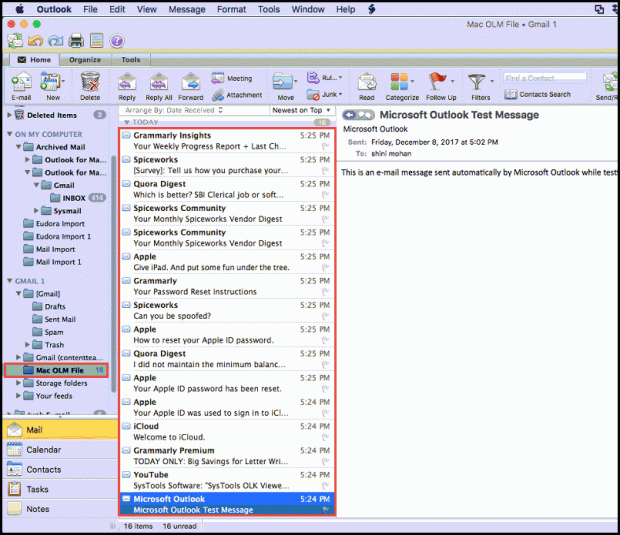
Once the account is configured, you will notice that all the Mac Outlook data (which is stored in the Gmail account) are successfully exported in Outlook Windows.
But the method is lengthy and users do not want a lengthy solution to convert data from Mac Outlook to Windows Outlook.
That’s why we have found many queries on forums where users want a direct solution to import from Mac Outlook files to Windows Outlook
Now, we are going to introduce an instant trustworthy way to move Mac Outlook (2011, 2016, 2019) to Windows Outlook (2019, 2016, 2013, 2010, 2007, 2003, etc) in the below-mentioned section.
Related: Methods to Export Emails Data from Mac Outlook OLM to Gmail
Alternate Method to Migrate Outlook for Mac to Windows Outlook – Automated Approach
An automated approach is the right solution to import or move Mac Outlook 2011, 2016, 2019 to Windows Outlook.
This method consists of two simple steps: first, the user has to extract data from Mac Outlook as an OLM file and then convert it to Windows importable format.
Step 1: Export Mac Outlook Data
- First, launch Mac Outlook (Outlook 2011/2016/2019) on your Mac machine. Click on File > Export.
- In the Export wizard, select the Outlook for Mac Data File (.olm) option and select the required items to export.
- Select Yes or No option in the Deleted After Exporting section and click on Next.
- Now, enter the suitable and location to save the exported Mac Outlook Data file and click on Save
Step 2: Convert Data to Windows Compatible Format
Once Mac Outlook data extracted as OLM, you will be able to see Outlook has finished exporting your data message.
Now, you have to convert Mac Outlook data to Windows Outlook supportable PST file format. For this, you have to opt for a professional solution that can convert OLM files to PST.
This software will transfer the entire data of the Mac Outlook OLM file to a Wind importable PST file. Once the file is converted you have to import the output PST file into Outlook for Windows.
Follow steps to Perform This Conversion –
1: Install the software & select the OLM file(s) which you want to import into Outlook.

2: Browse the files from their location. After loading them, click on Next to proceed.

3: You can decide if you want to export all files or only a few selected ones. Choose the PST export option and click on “Advance Settings”.

4: Apply PST split settings, choose categories to export, and apply Date range filtering.

5. Choose to maintain folder hierarchy, search a destination to save the files, and click on export.

After that, we have to import PST data into Outlook for Windows to access data. Follow the given steps to do this task:
- First, launch Microsoft Outlook. Then select Import/ Export Wizard.
- Now, you have to select Import from another program or file and click on Next.
- Click on Browse and locate the PST file.
- Select Replace Duplicates with Items imported and click on the Next button.
- Now, you have to select the Outlook Data File option and check the Include subfolders option.
- Select Import items into the same folder in the drop-down list.
- Click on the Finish button.
Note: If you are a Windows user and if you have Mac Outlook OLM files present in it, then choose the following software:
Summing Up
Nowadays, technology changes with the speed of light which leads to change in the user requirements also. This also applies in the case of email clients. There are numerous email clients and user opts for an efficient email client as per there requirements. Sometimes, Outlook users need to migrate Mac Outlook to Windows Outlook. Thus, in the above section, we have explained various methods to help you execute the task efficiently and effectively. It ensures that your source files remain safe and secure while you process them.