G Suite to G Suite Migration Guide: A Step-by-Step Solution


This is a complete Guide for Google Apps (G Suite) users to understand the methods to migrate from G Suite to G Suite. As Google only provides the option to migrate emails using Admin console, many IT Admin faces difficulties because other Google Apps (contacts, calendars, and documents) migration is as important as G Suite email migration. This is why we have written this G Suite to G Suite migration Guide.
It contains the in-depth working of the G Suite Admin console for email migration and manual methods to migrate other Google Apps data. For the ease of the user, we have also provided an automated tool that can single-handedly migrate G Suite to G Suite with all Google Apps quite easily.
Instant Solution: Download tool for complete G Suite account migration in few steps.
Navigation Panel
#1: Perform G Suite to G Suite Migration, Manually
Currently, there is no direct way to migrate complete G Suite account data to another G Suite account. However, using multiple methods, IT admin can perform the migration successfully for multiple users in a domain. Let’s see the steps wise guide for working.
1. Migrate Emails From G Suite to G Suite using Admin Center
The Data Migration Service available in G Suite Admin Center allows the IT admin to effortlessly migrate emails from multiple G Suite accounts simultaneously. Following are the detailed working steps of data migration service of Google’s:
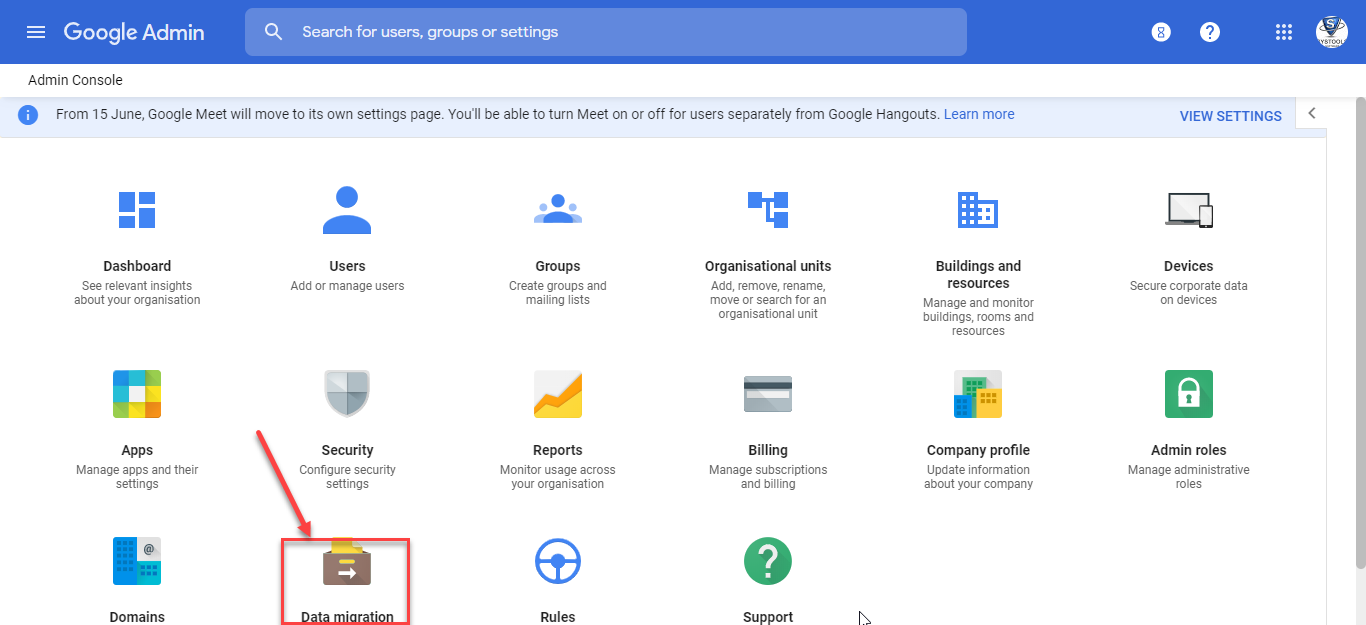
- First, go to https://admin.google.com/ and login into the Destination G Suite Administrator account using Admin id and password.
- In the Admin Panel, you will see multiple tabs available on the Home screen. Choose the “Data Migration” tab to manage migration.
- In the Data migration panel, you can get more information about the data migration service. Or, just click on the SET UP DATA MIGRATION link.

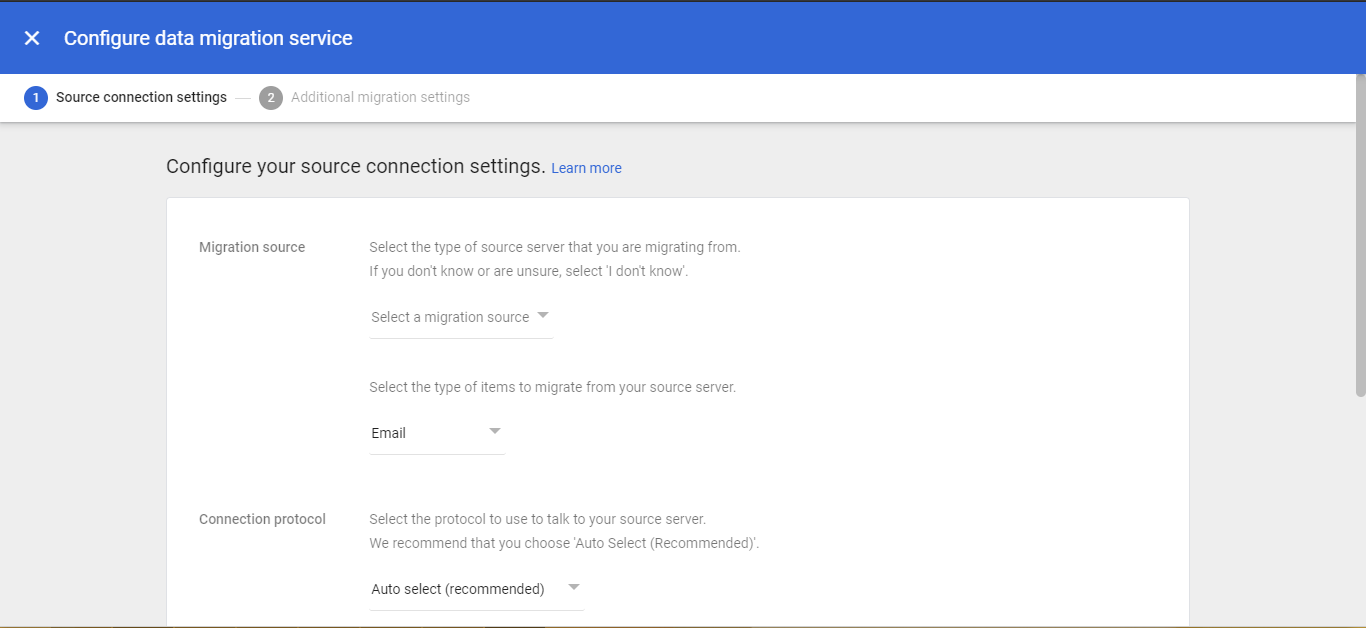
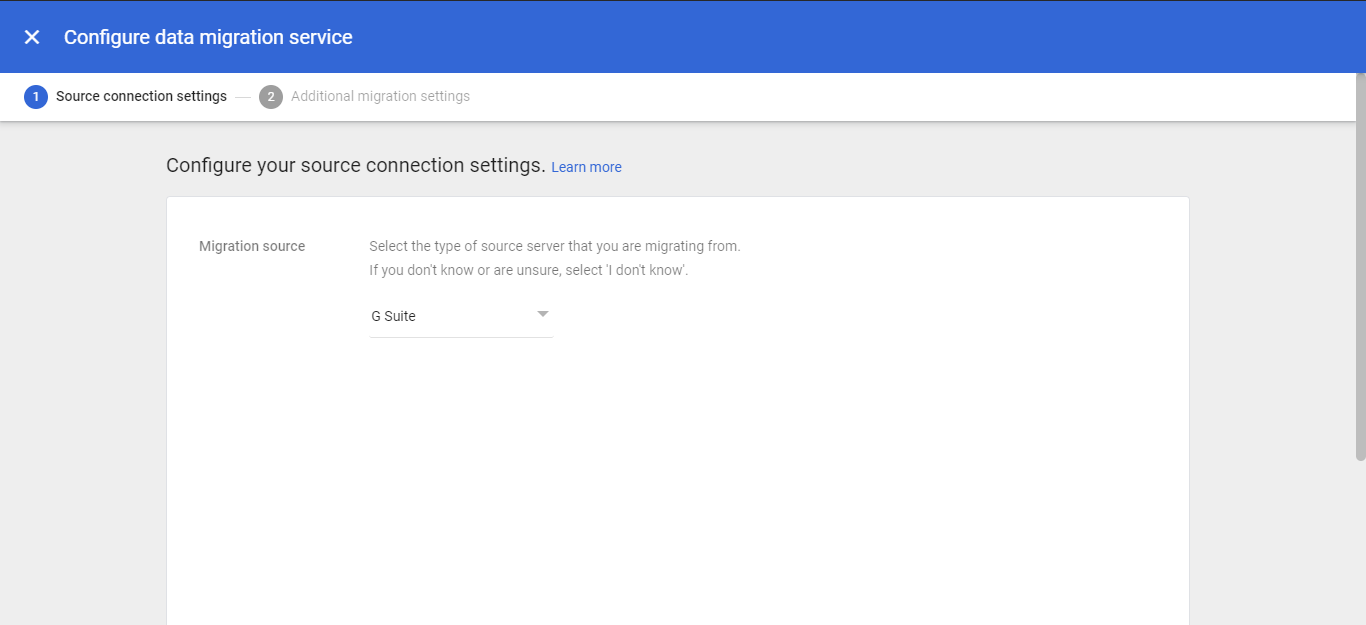
- After that you will get a Configure Data migration service window, where you will get many information listed. From the Migration Source section, choose “G Suite” from the drop-down menu option.
- After selecting the migration source as G Suite, all the other option will vanish from the screen. Now, just click on the “Start” button at the bottom of the screen to continue with G Suite to G Suite migration.
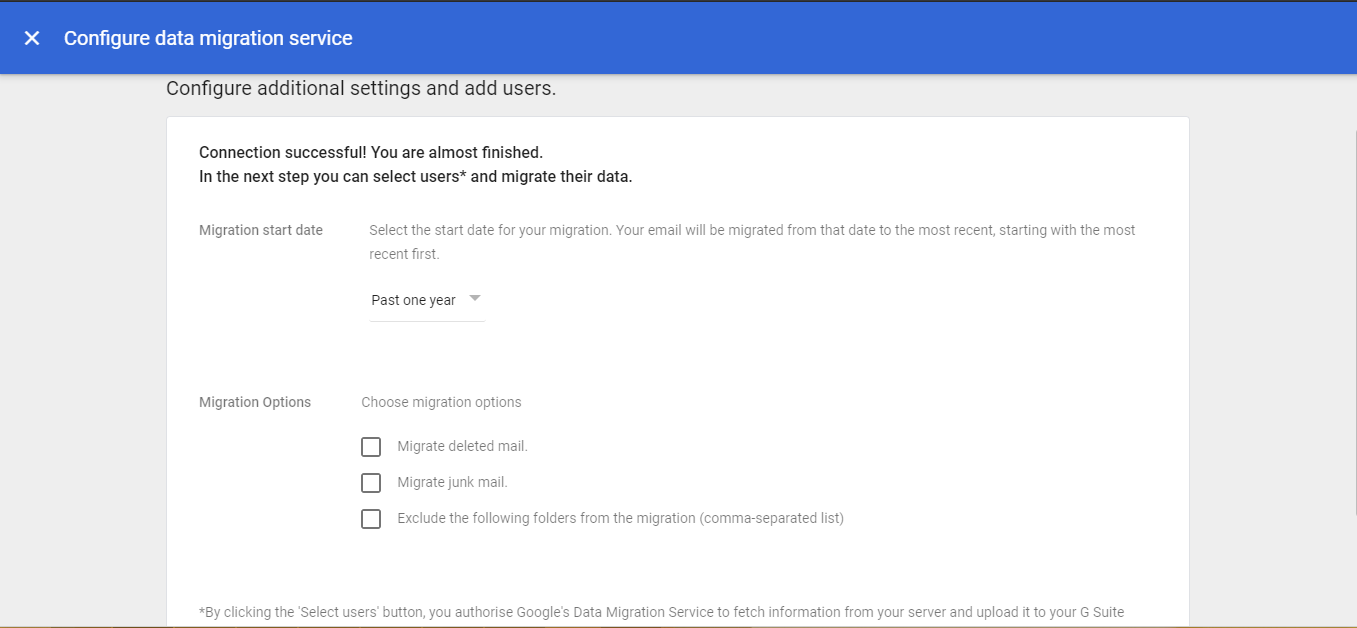
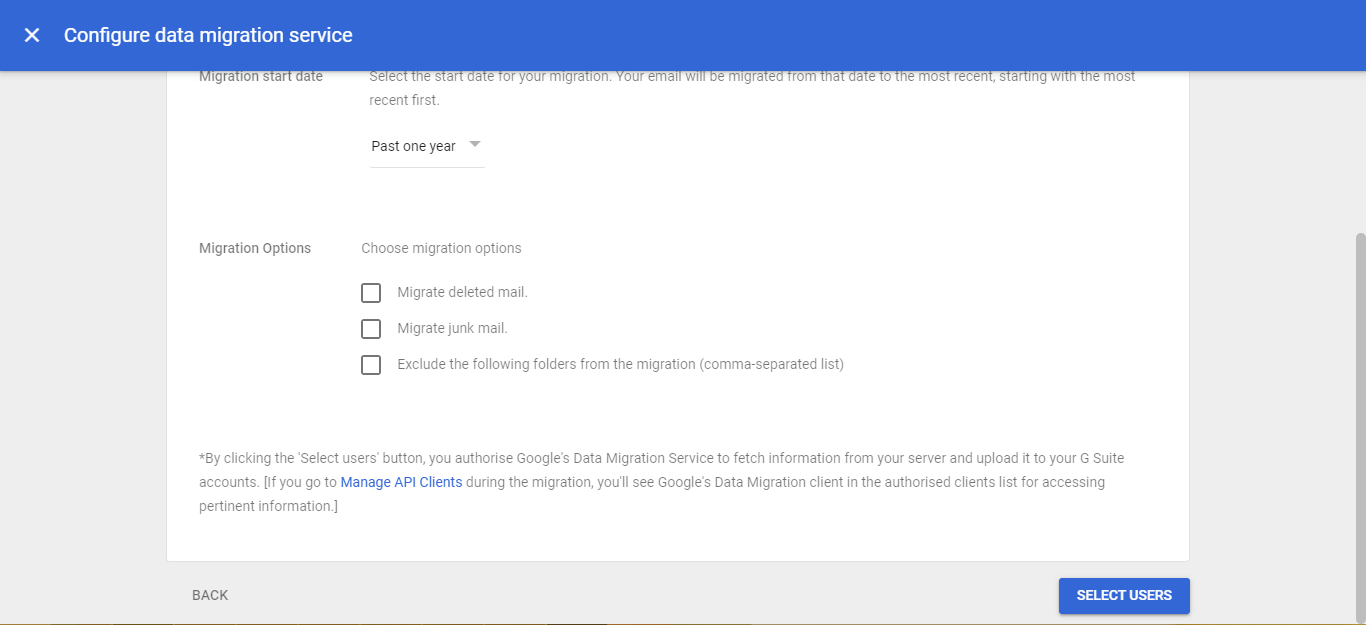
- Next, you need to provide the Additional Configuration Settings for the migration. Provide the details about such as:
- Migration Start Date: This option allows the Admin to select the start date for migration. All emails will be migrated from selected start date till the most recent date.
- Migration Options: You can select or deselect the particular folder for migration by selecting the provided options.
- When you are done with providing additional configuration settings, now you can select the users for the migration. Click on Select User button at the bottom of the migration screen.
- In next window, you will get details about the migration source and Start timing. And, you will get a bunch of options also for selection of users: Add user and Bulk Upload with CSV.
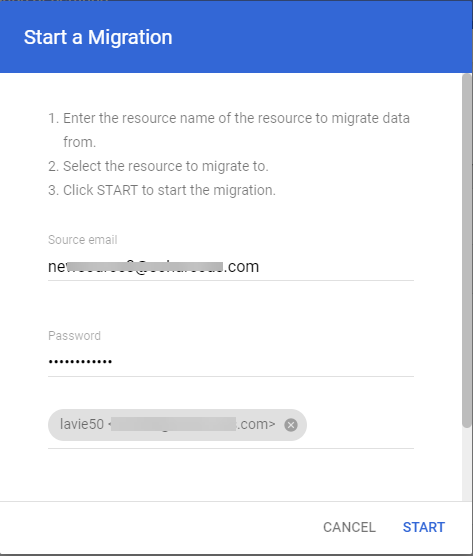
- Add User: This option is used when Admin wants to perform G Suite to G Suite migration for a single user. In this, Admin has to provide a source user email id and password. And choose the destination user account for the migration. After that, click on the Start button to begin the migration.
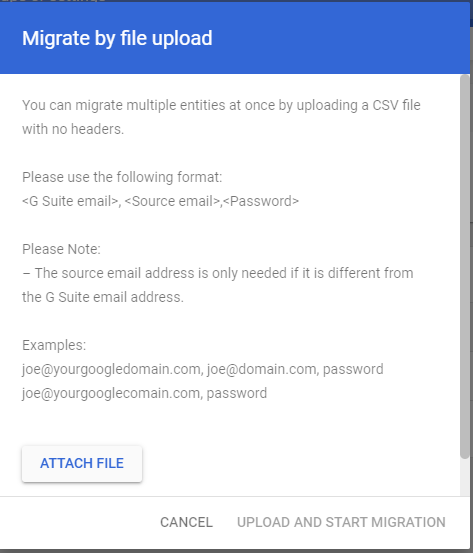
- Bulk Upload with CSV: Use this option when there are multiple users accounts needed to migrate from G Suite to G Suite. In this you need to create a CSV file containing <destination id>, <source user id>, <source user password> without any header. Click on Attach File option to browse and upload the CSV file and after that click on UPLOAD AND START MIGRATION option to begin the process.
- Add User: This option is used when Admin wants to perform G Suite to G Suite migration for a single user. In this, Admin has to provide a source user email id and password. And choose the destination user account for the migration. After that, click on the Start button to begin the migration.
- After completion of migration, you will get the migration status as complete (As shown in the screenshot below).
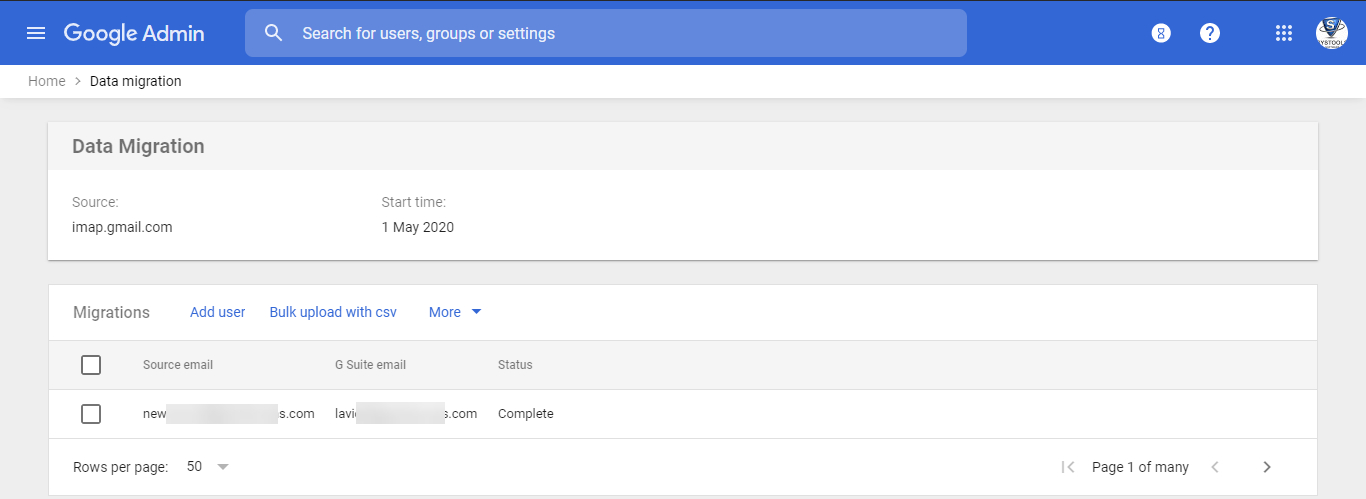
- If you want to check the migrated data, then you can simply click on the More button and choose the “Email Reports” option from the list. This will create a detailed report about the migrated data. Choose the recipient for the report and click on Send.
- After completion of G Suite to G Suite migration, you can exit the migration by click on the Exit migration button from More tab.
The above steps are just for migrating emails from G Suite to G Suite account. Now follow the other methods for contacts, calendar, and document migration.
2. Method Migrate Calendars From G Suite to G Suite Account – Single User
Using the import/export option in the Google Calendar account, you can easily migrate calendars from Single G Suite account to another.
Step 1:
- Go to https://calendar.google.com/ and login into source G Suite user account.
- Click on the Gear Icon and then click on Settings.
- Choose the Import/Export tab and then select Export option.
- Select the calendar items you want to export and then click on Export button.
- After export process is complete, unzip the downloaded zip file.
Step 2:
- Login into the Calendar account of the destination user
- Click on Gear >> Settings >> Import/Export >> Import option.
- Hit the “Select file from your computer” option and browse the calendar file.
- Click on the Import button to fetch all the calendar data into destination user account
3. Migrate Contacts from G Suite to G Suite Account – Single User
As done for calendar migration, similarly you can migrate contacts also from one G Suite account to another. This process is also for a single user account contacts migration.
Step 1:
- Go to https://contacts.google.com/ and login with source user id.
- From the left-hand side of window, click on Export button
- Now you can export all contacts in a CSV file
Step 2:
- Login to destination G Suite user account
- From the same left-hand panel, choose Import option
- Now, click on Select File button to import all contacts from a csv or vCard file.
4. Migrate Document Between G Suite Accounts – Single user
To migrate documents please follow the other guide to get multiple options for Google drive document migration.
Alert: In the above section, we have explained the manual method for G Suite to G Suite migration. Only the email can be migrated for multiple users, whereas, contacts, calendar, and documents required to be migrated for a single user at a time.
#2: Migrate G Suite to G Suite Completely – Multiple User Account Migration
Many IT Admin doesn’t have so much time to migrate single user account data at a time. In such scenarios, when needed to migrate G Suite to G Suite for multiple users they can take help of automated tools available in the market. As such a tool, we are going to explain in this guide below.
Using the G Suite to G Suite Migration tool, IT Admin can migrate complete account data (emails, contacts, calendar, documents) between multiple user accounts simultaneously. The tool provides end-to-end encryption during the migration and provides effortless migration of sensitive data present in the account. Additionally, during the migration process, the tool provides various filtering options for transferring selective items and categories between G Suite accounts.
Pre-Requisites for the Automated Migration Process
- Create One Time Google Cloud Console Project Source and Destination Accounts
- Makes sure destination user accounts should already be created before initiating the migration.
Steps to G Suite to G Suite Migration via Professional Solution:
1. First, Download the G Suite Migrator and Install it on Windows 10 / Server 2012 / 2016.
2. Next, click on the Activate button and proceed with the activation steps.
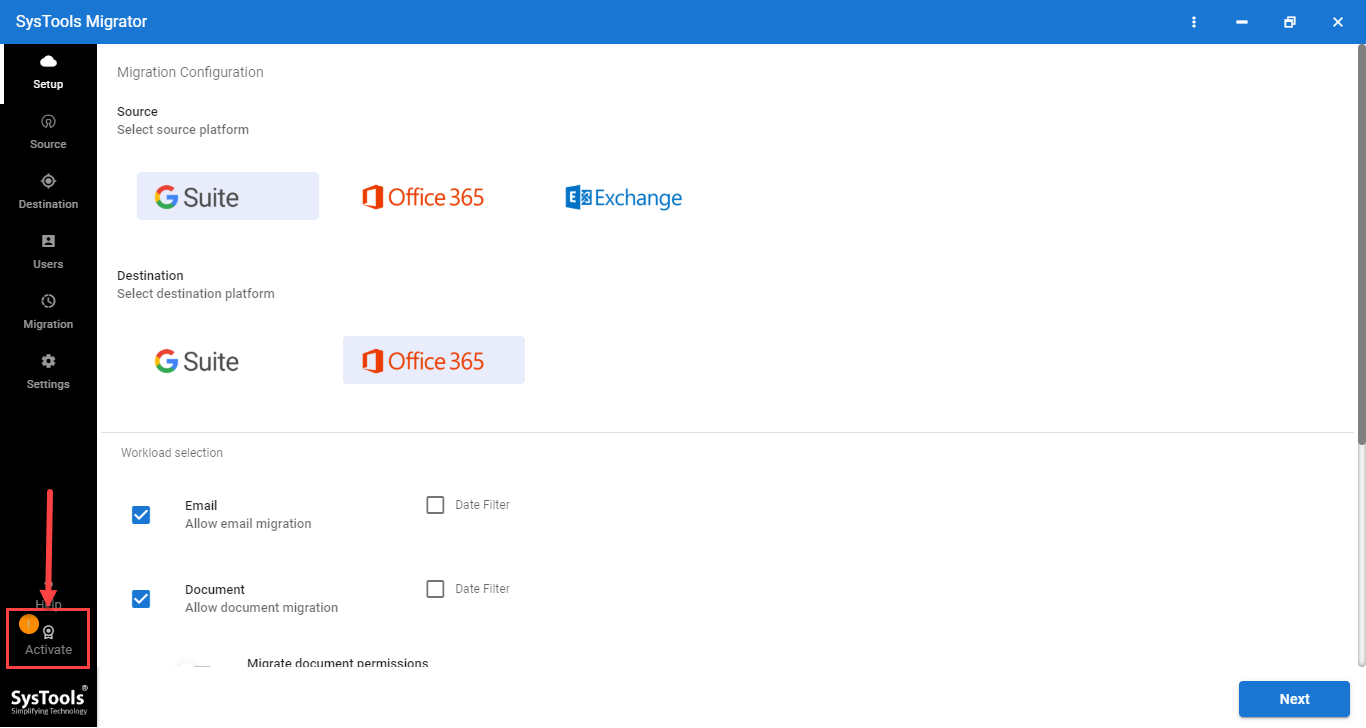
3. After activation of your domain and tool, select the source and destination platform as “G Suite”.
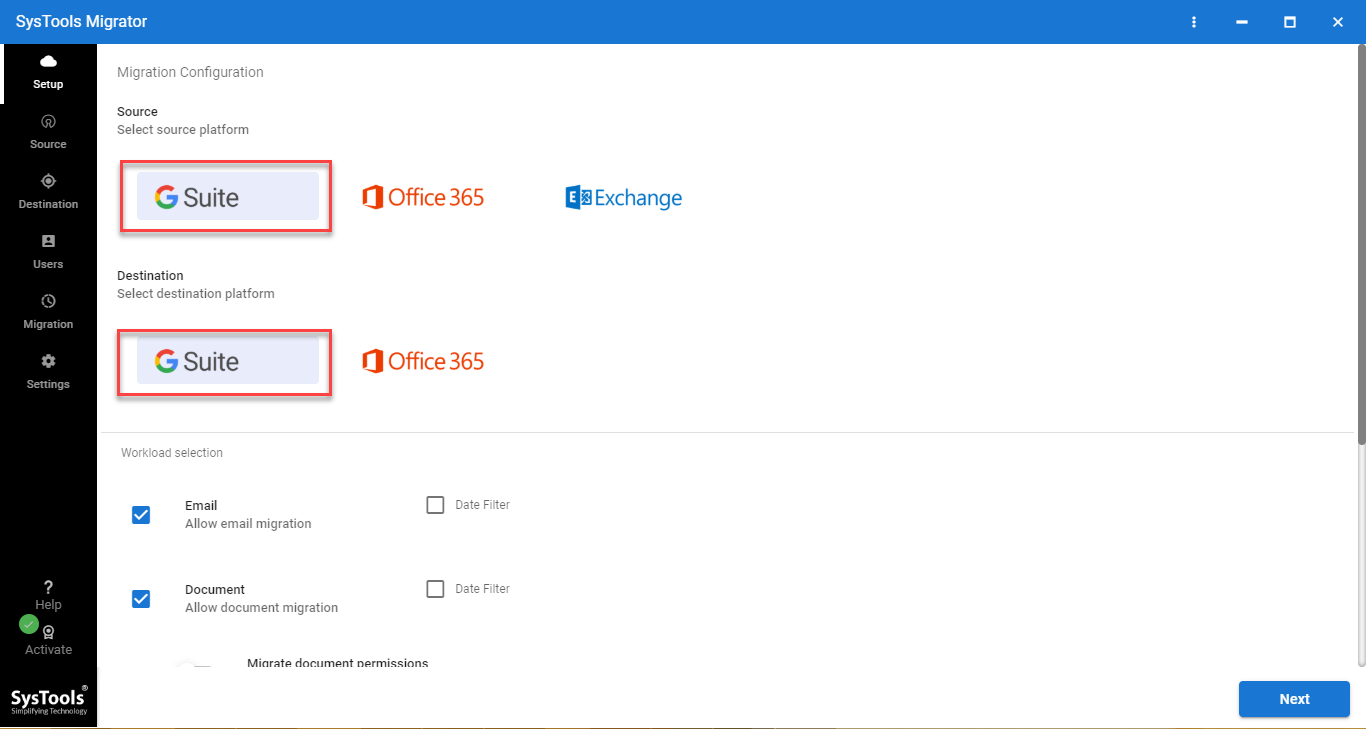
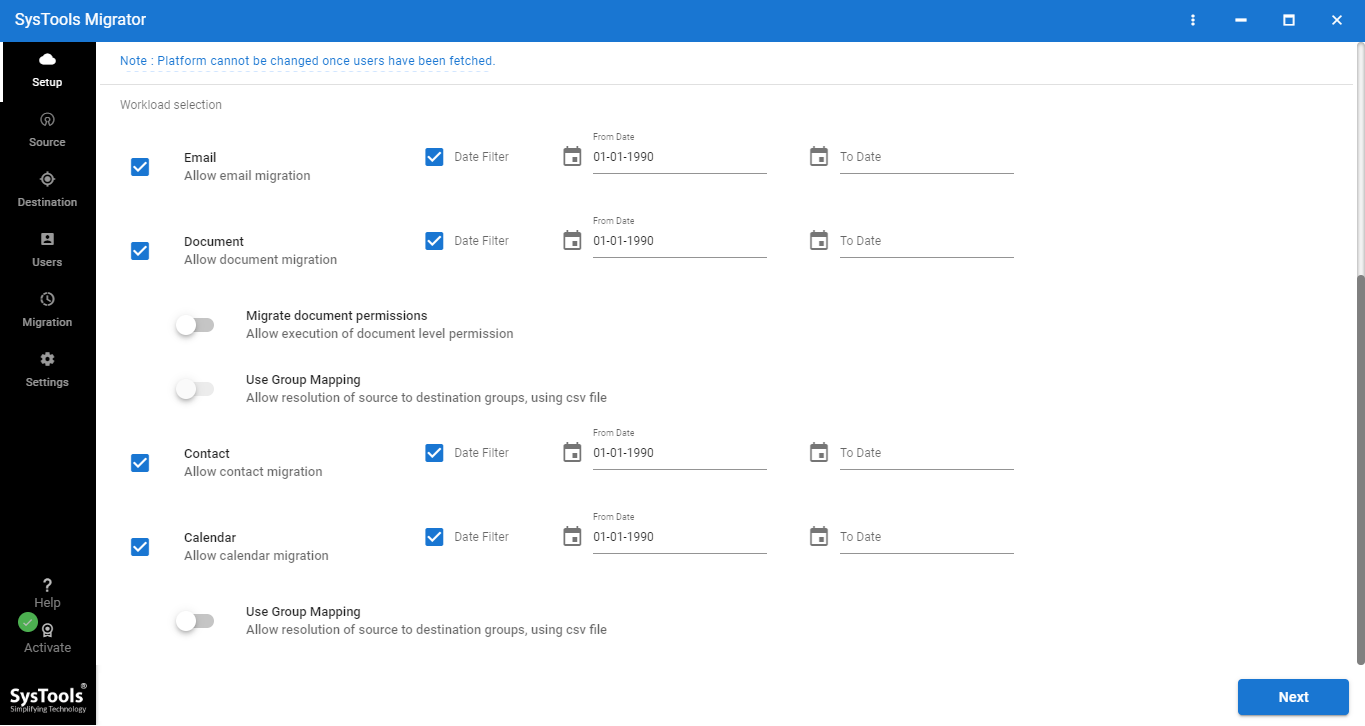
4. From the workload section of the tool, choose the categories of items to migrate from G Suite to G Suite. You can also set the Date-Range filter option to migrate data of a particular time interval.
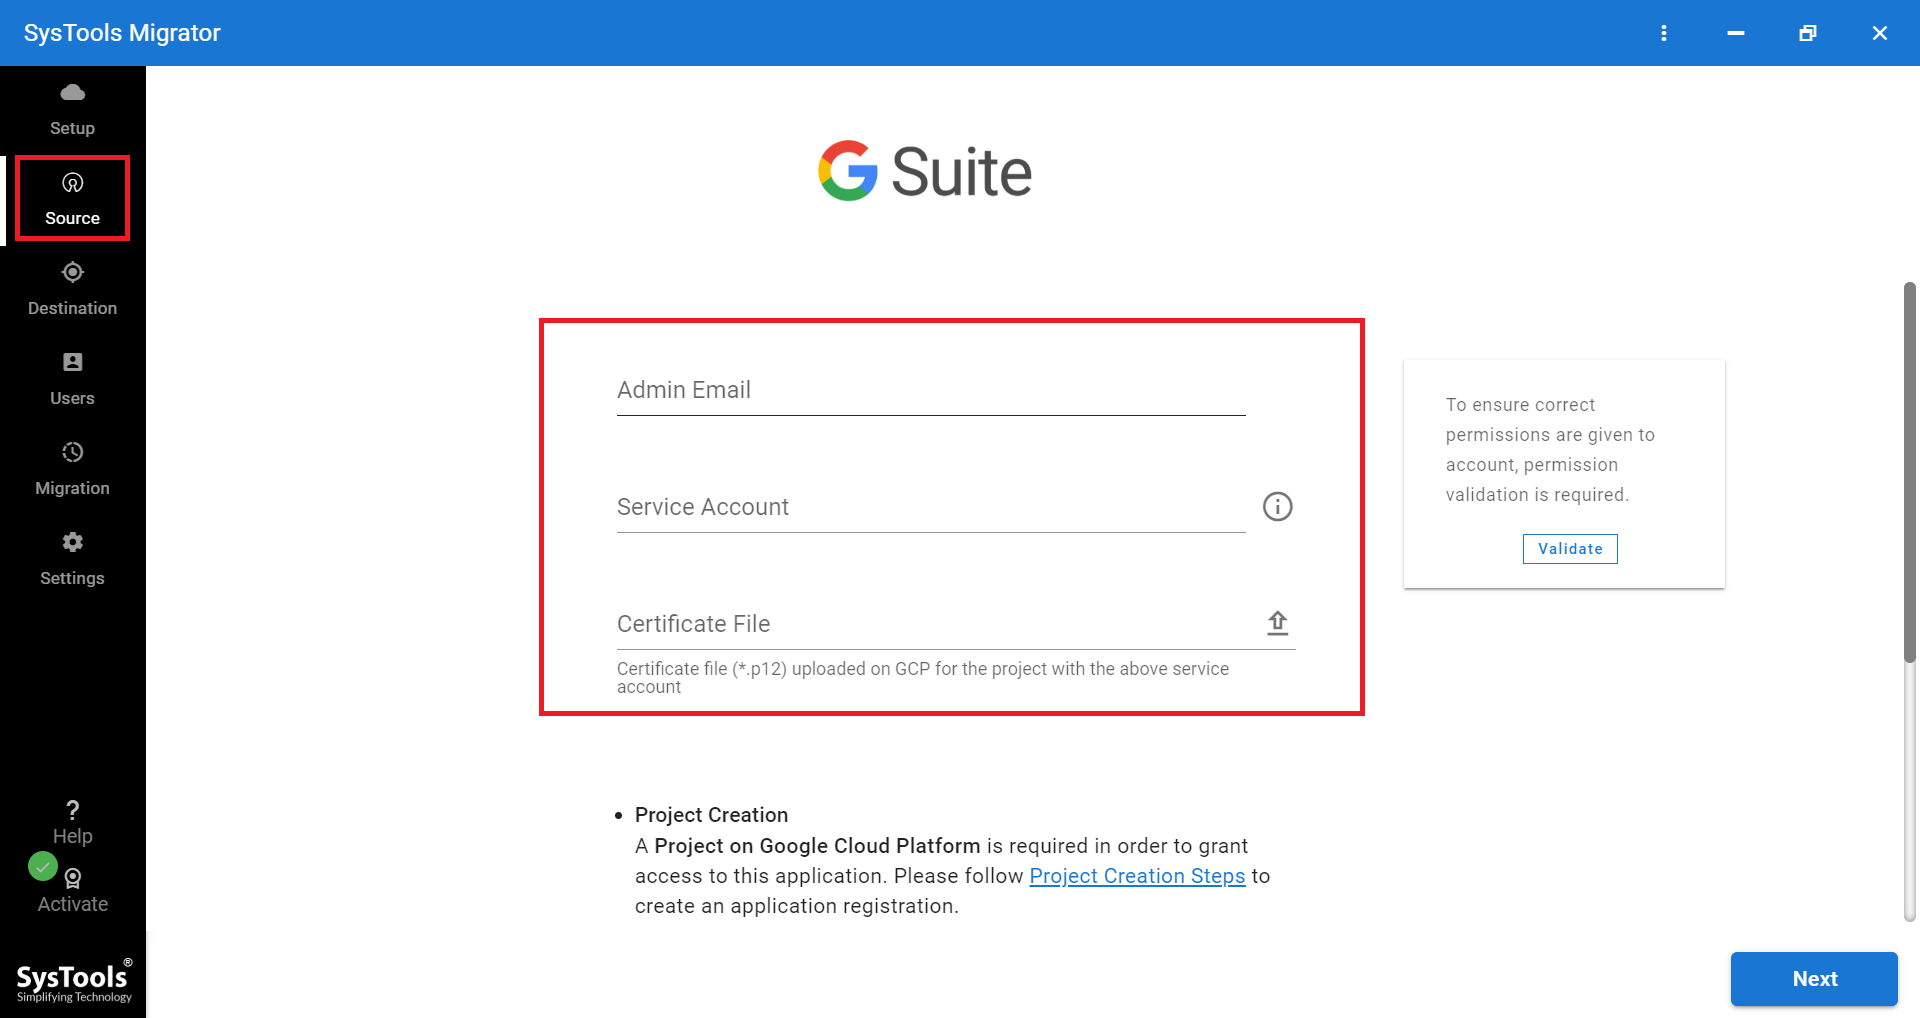
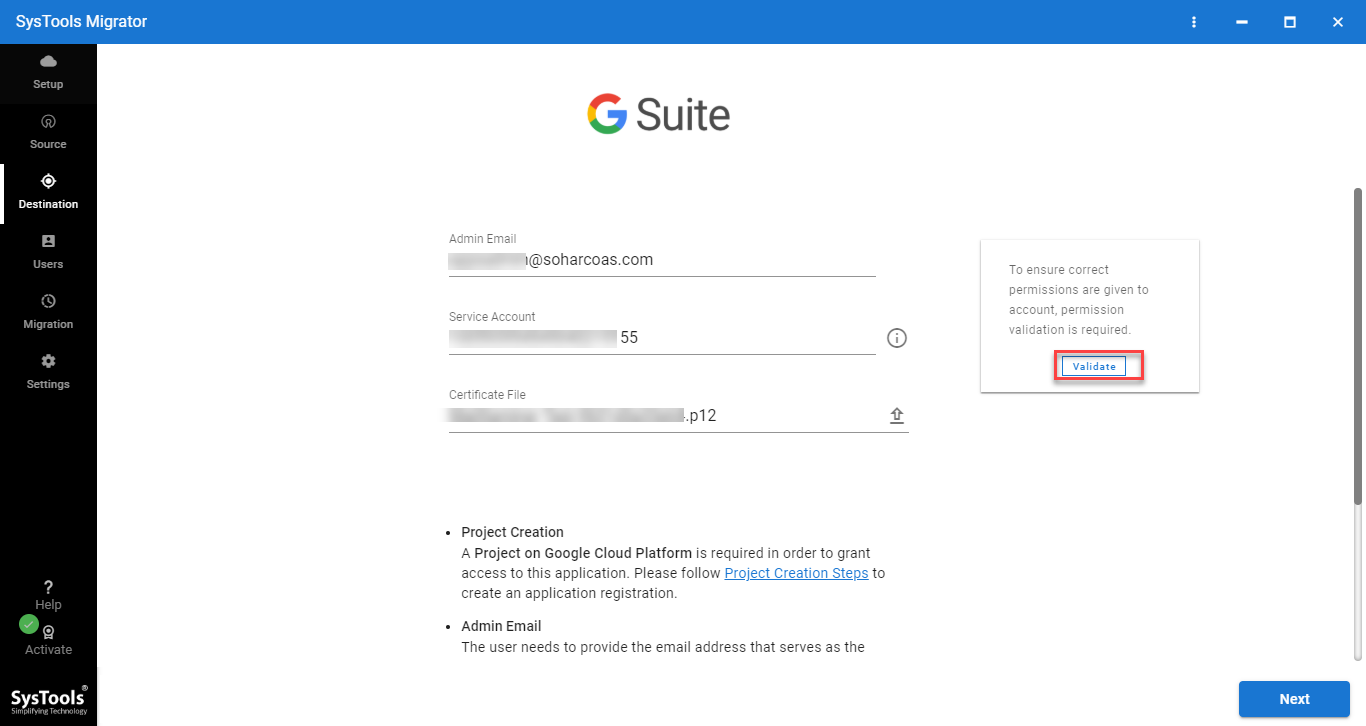
5. Now, from Source tab, enter the G Suite Admin Id and provide Application Id & p12 file path created during project creation. After providing click on Validate button for the authentication of the email id and project settings.
6. Similarly in Destination tab, provide Destination Account details and validate.
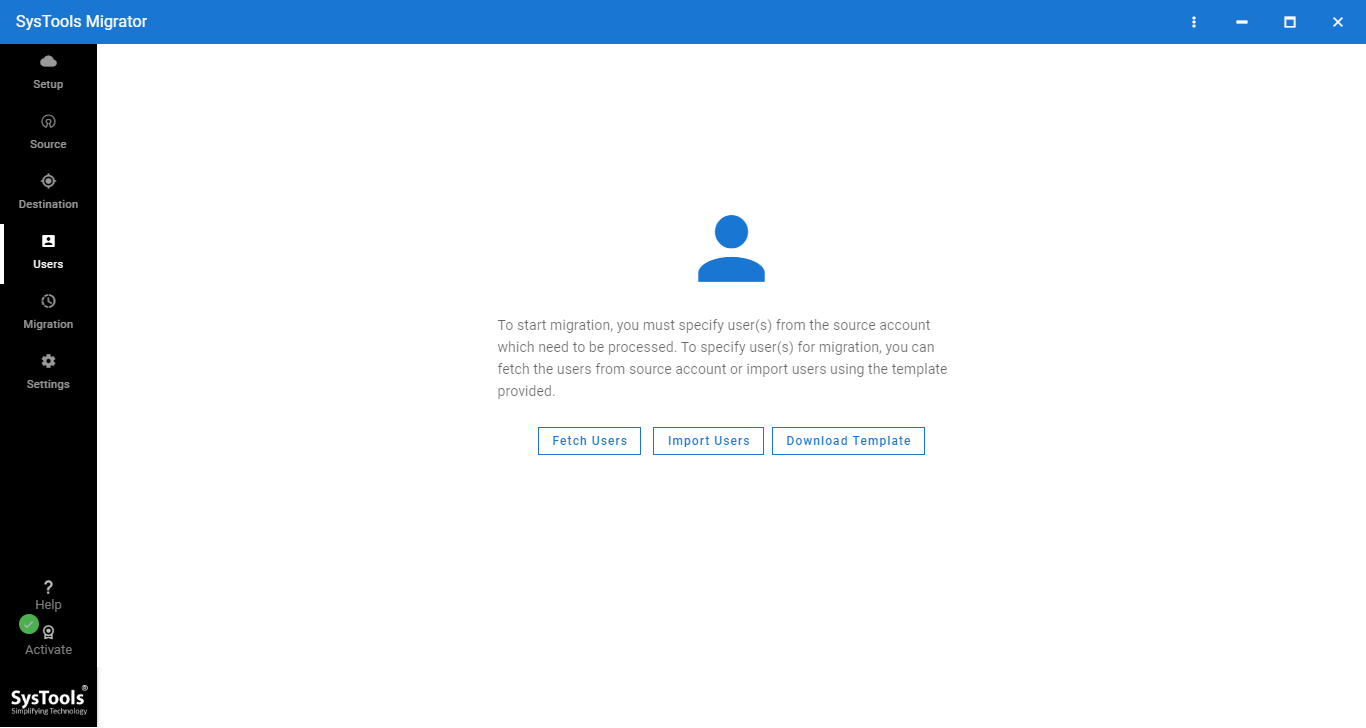
7. In the User tab, the tool will provide you two options for source and destination user mapping, such as:
- Fetch User: This option will fetch all the source user accounts and list them in the user window. Later you can manually provide the destination account for each fetched user for migration.
- Import a CSV file: You can also create a CSV file for mapping between the source and destination user accounts and import the csv file into the tool.
8. After completion of the mapping, you can select the users from the user window for migration and also provide priority before migration.
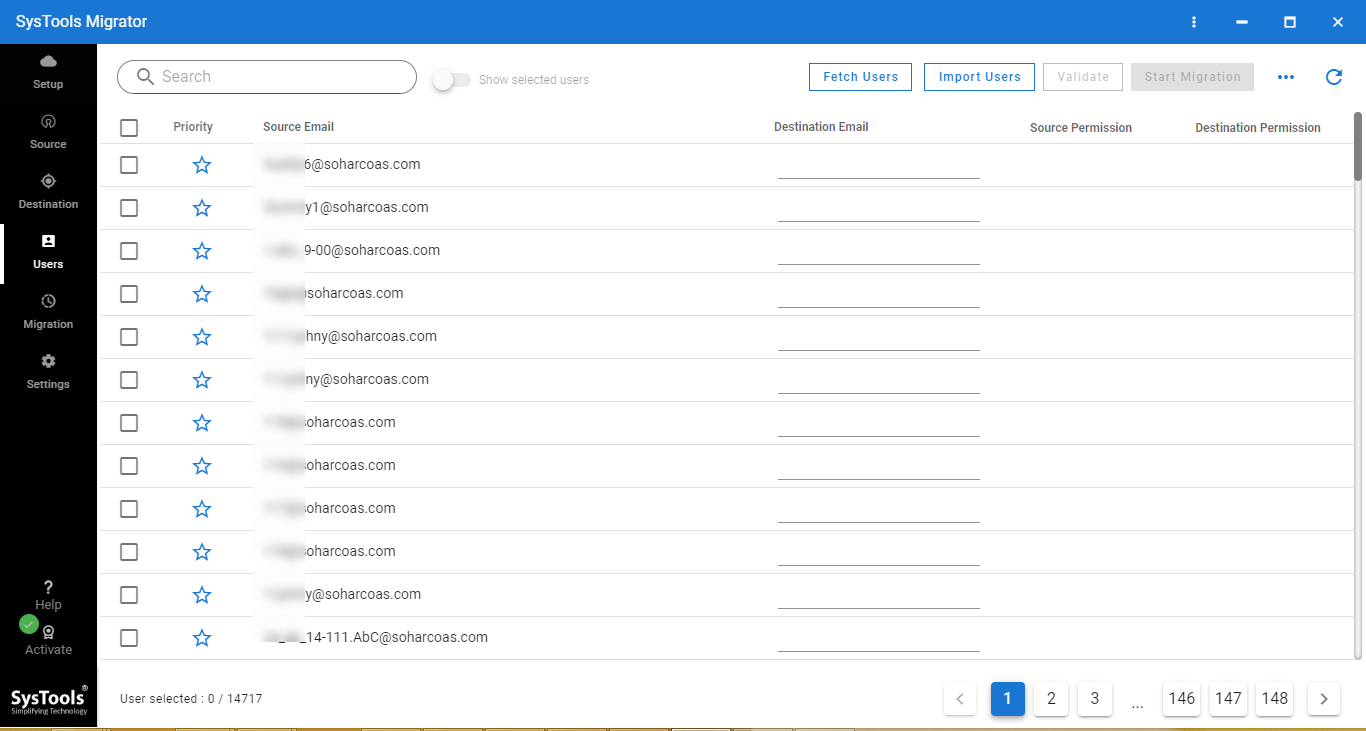
9. Now, click on the Validate button for the validation of the source and destination user account. Then click on the Start button to begin the G Suite to G Suite migration.
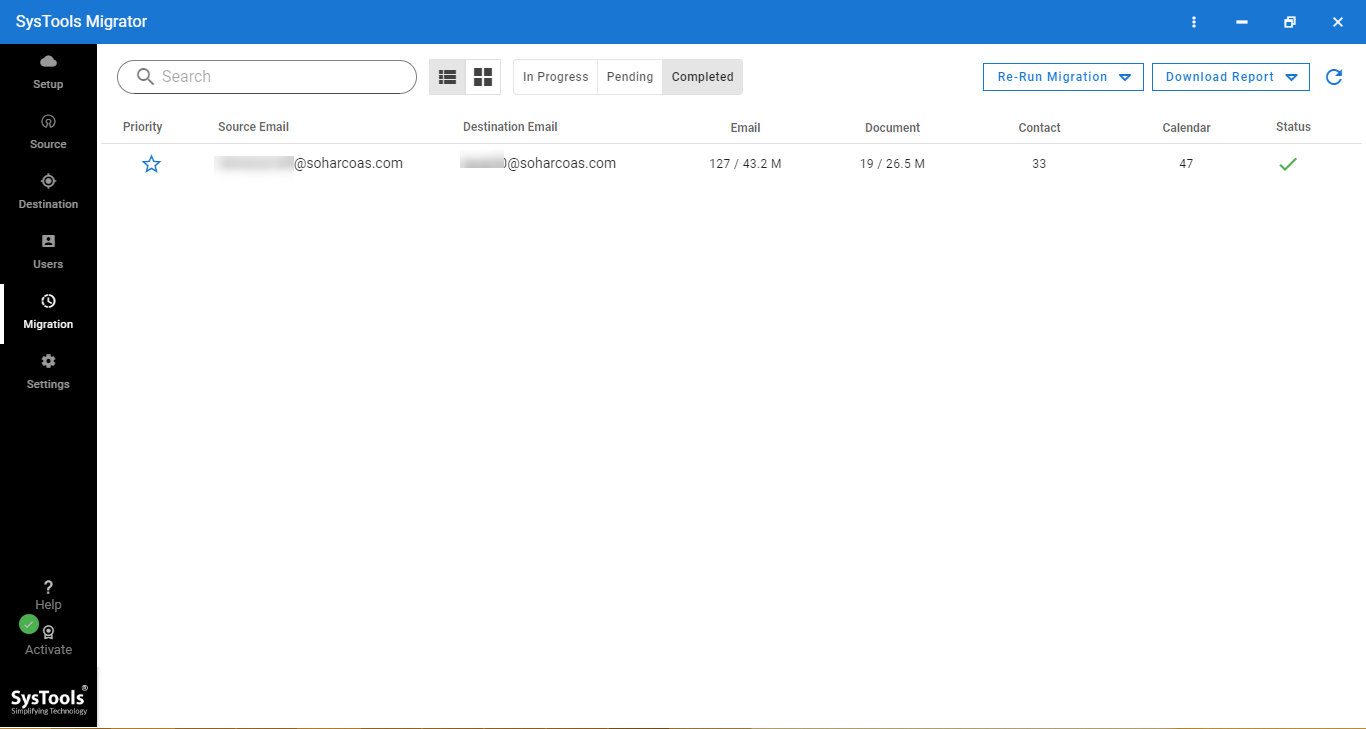
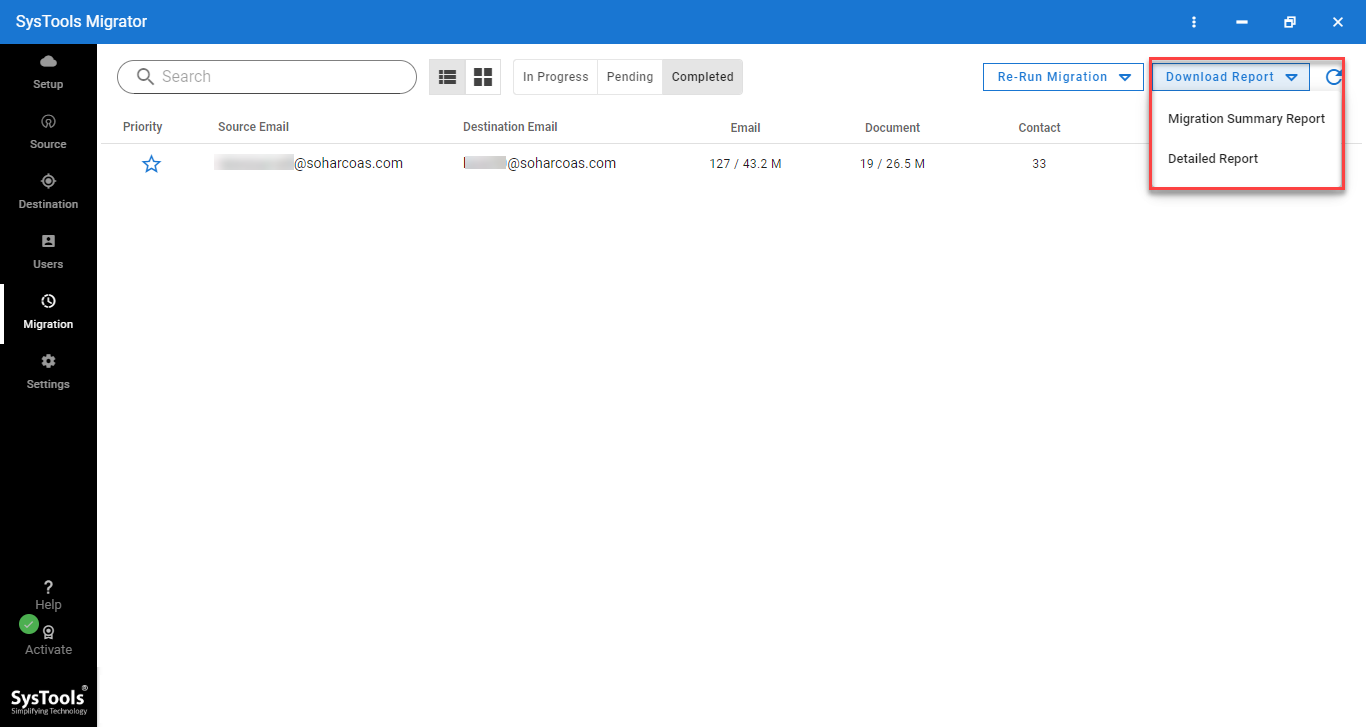
10. After completion of the migration, you can save the detailed and summary report using the Download Report button. Choose the desired location on your computer to download these reports.
Why Choose Automated Tool?
Apart from complete G Suite account data migration, there are many more features that make G Suite migration tool more user-friendly, such as:
- Category-wise and Date-Range filter options
- Migrate Document, Group and Calendar permissions between G Suite accounts
- Multiple easy source and destination user id mapping options during migration
- Migrate from G Suite to G Suite with Admin account only, this provides high-level security to organization data
- Quick help section to guide through every step and feature of the tool
- Generates detailed and summary report for validation of migrated data
- Retry failed items option to retry all the failed items during the last run.
- Delta Migration option, that provides unlimited delta passes for new/ update data migration.
- Re-Run Full migration option to migrate items of each category that skipped in the last attempt.
- Concurrent Migration option to create multiple migration projects.
- Complete migration view (status) in list and tile view in the software UI.
Why Do We Care?
In this G Suite to G Suite migration guide, we have provided new and improved Data migration services working with screenshots. You can use this service to migrate emails between G Suite accounts and use multiple other methods for contacts, calendars, and documents migration of one user at a time.
We have also provided a unique automated tool for fast and complete G Suite account migration. The aforementioned G Suite migration tool is the best alternative of Google data migration service using which admin can effortlessly migrate from G Suite to G Suite. You can download the tool for free and you will get 2 free user licenses for complete account migration of a G Suite domain.