Learn the Reliable way for Moving Email from a .pst File to Your Office 365 Account


Many organizations have to protect their employee’s .pst files available in their system. The only way of safekeeping the PST file is to import it into Office 365 user accounts. There is a number way for moving email from a .pst file to your Office 365 account.
One way to import the PST file is by using the Import/Export wizard of Outlook. This solution is best suited for less technical users and when they need to import a few PST files into a single account.
Another free method is provided by Microsoft itself, such as Network Upload and Drive Shipping. In this blog, we will be discussing the steps to move PST file to Office 365 using network upload. But before that, get a quick overview of the work of both manual solutions provided by Microsoft.
- If the import service is available in your region then you can use the Network upload method. It is a technical method for importing multiple PST files available on the corporate network to temporary Azure storage and moving emails from each PST file to Office 365 user account.
- Drive Shipping method is an alternate solution for network upload. If you don’t want to go through the trouble of moving emails from a PST file, then use this option. In this, you need to place all PST files into a secured drive and ship it to Microsoft’s Data Center. They will perform the task for you and charge $2 per GB of PST file data for moving.
Also Read: How to Download Office 365 Mailbox? 2 Different Approaches
Steps for Moving Email from a .pst File to Your Office 365 Account
1) Copy the SAS URL from Azure Storage
We suppose that you already have the PST file prepared for moving emails to Office 365 account. Follow the steps below to determine to destination and copy SAS Url.
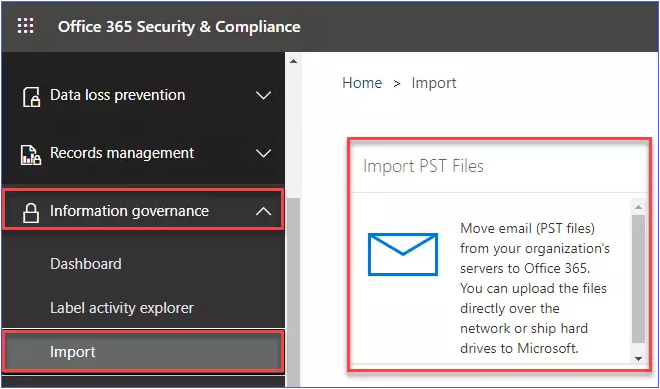
1. Visit https://protection.office.com/ and log in with Admin Account credentials. After login in choose the Information Governance option and then choose the Import tab. From the Import window select the “Import PST File” option.
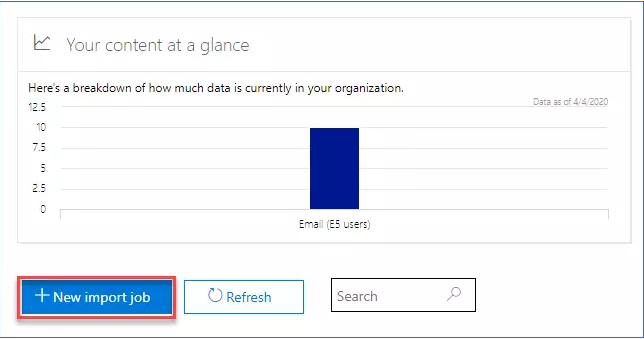
2. This option will be the first step to move emails from your organization’s server to Office 365. The new Import PST file window will preview the graphs containing information about the amount of data currently available in your organization. Click on New Import job button to create a PST import job.
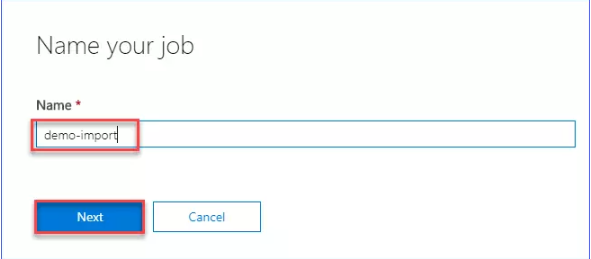
3. In the pop-up option provide the name to the import job and click on the Next button to continue.
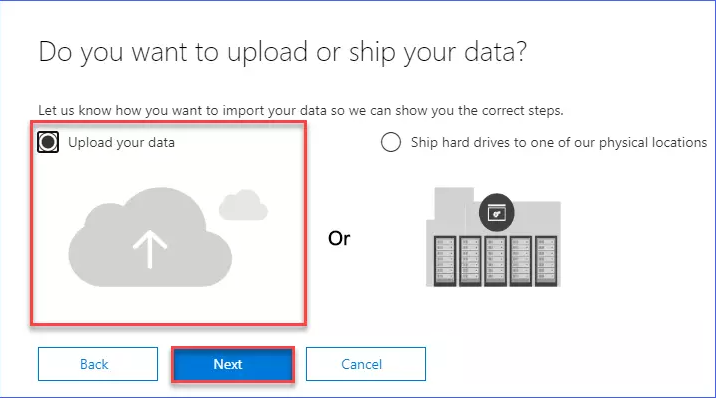
4. After that you will receive two options in the window, click on the “Upload your data” radio button.
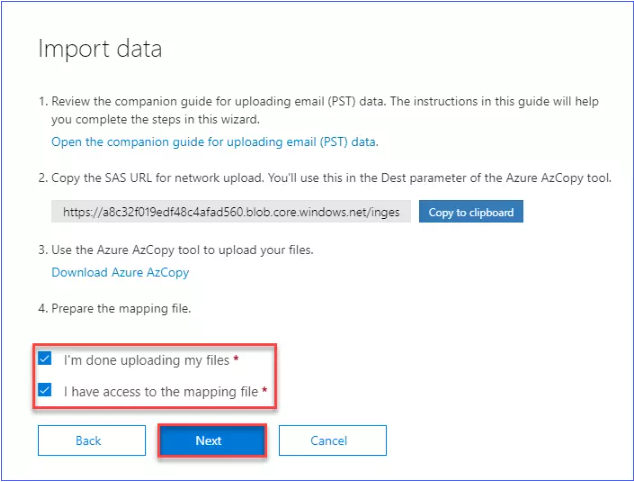
5. Now you will get an Import data window, click on “Show network upload SAS URL”. After that, the application will retrieve a SAS key for the Azure Storage location.
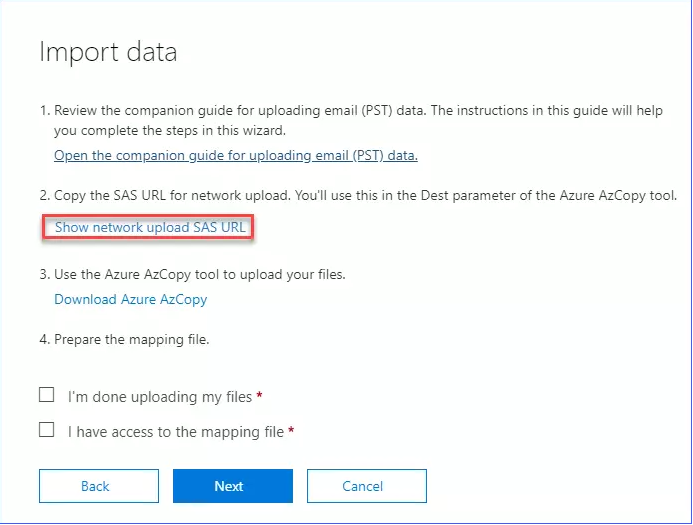
6. Later, you will get a SAS URL. Click on the “copy to clipboard” button and safely store the URL somewhere to get it back later.
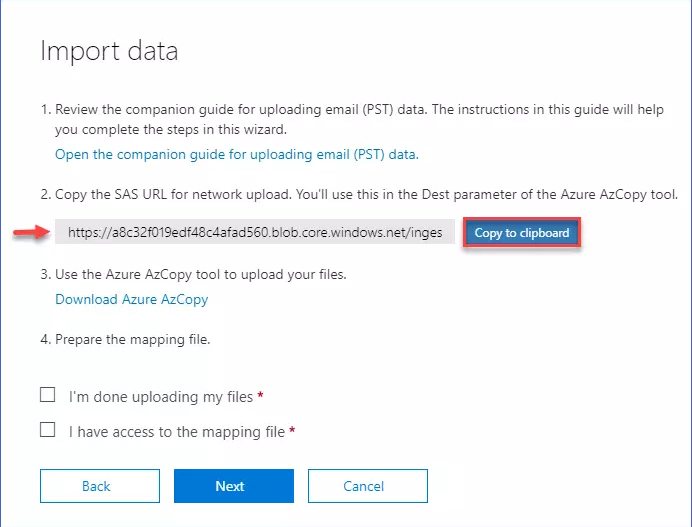
7. Now you have the SAS URL that can be used in the AzCopy tool to upload destination in Azure storage location.
2) Use AzCopy Tool to Migrate Email from PST to Office 365
1. If you don’t have the AzCopy tool, then from the Import data window, click on the “Download Azure AzCopy” tool. Make sure to always use the latest version of the tool for moving emails from a PST file to Office 365.
2. Click on the downloaded tool file and Install it on your machine.
3. After installation is finished, on your desktop search for Azure storage and click on the Microsoft Azure Storage AzCopy result to open the tool.

4. After opening the tool, you need to specify the following options for it:
- /source – You need to provide the source location of the PST file whose emails need to be moved to the Office 365 accounts.
- /destination – Paste the SAS URL here, that was generated in the previous step.
- /v – This is necessary to enable the verbose for logging and specifies the path for log file. This is to ensure, if anything goes wrong during the process, then you will have log data to refer later on.
- /y – This option doesn’t require any change or specific value. It is required when using AzCopy with SAS URL.
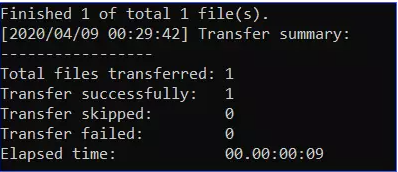
Run the Command: AzCopy.exe /Source:”C:\PST” /Dest:”PASTE SAS URL HERE” /V:”C:\temp\log” /Y
After the execution of the above command, you will receive a transfer summary containing the details about the PST file that has be uploaded to Azure storage location.
Preview the Uploaded PST file In Azure Directory (Optional) for Moving Email from a .pst File to Your Office 365 Account
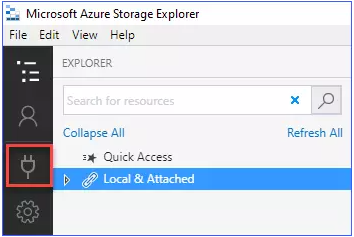
1. This is an optional step, for the confirmation of the uploaded PST file in Azures storage. This task can be done with the help of Azure Storage Explorer to preview the files in Azure storage location.
2. Download the Azure Storage Explorer from the Microsoft website and launch it. After launching, you will get an Open Connect Dialog button. Click on the button which is present near the plugin icon.
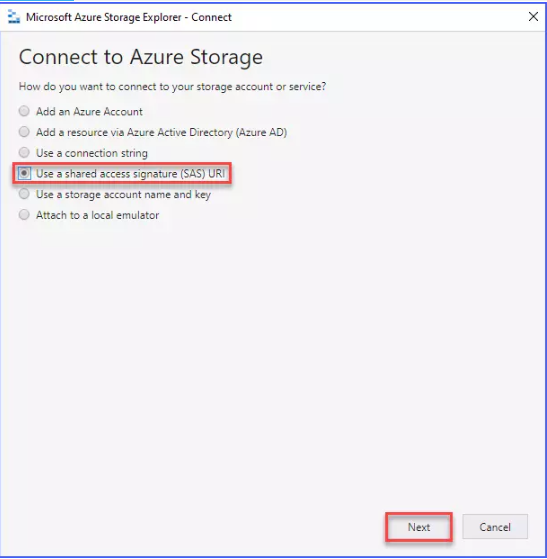
3. From the next window, select the “User Shared Access signature SAS URL” radio button from the list. In the next window, Paste the SAS URL in the URL field and then click on Next button.
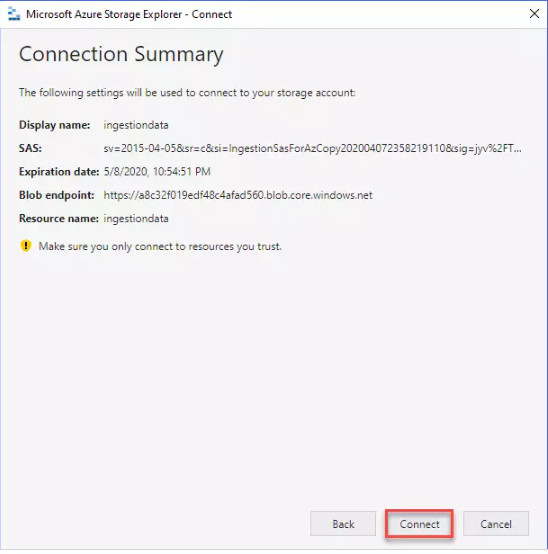
4. A pop-up will be generated providing warning about the Connection Summary. Simply click on the Connect button to proceed further.
5. After the connection is completed, the Explorer window will show the details about the uploaded PST file.
3) Create a Mapping File for Import Job
1. Now, it’s the time to create a mapping file for the import job. This mapping .csv file will contain the location of the PST file and the destination account for each PST file.
2. Create a PST file with header as Workload, FilePath, Name, Mailbox, IsArchive, TargetRootFolder, ContentCodePage, SPFileContainer, SPManifestContainer, SPSiteUrl

3. Fill the entries in the mapping file and save it as .csv file in C:\ drive.
4) Continue with PST Import Job
After successfully uploading PST file in Azure storage and creating a mapping CSV file, you are ready to resume the PST import job.
1. Go to the Import Page from where you have generated the SAS URL. Check on the following options: I’m done uploading my files, as well as I, have access to the mapping file. After that click on the Next button.
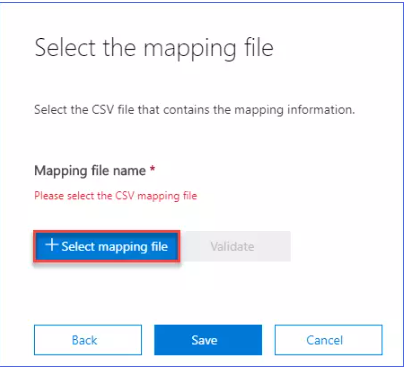
2. In the Select, the mapping file window, click on the “+select mapping file” button and then click on the Validate button. If there are no errors generated during the validation, then click on Save button to continue.
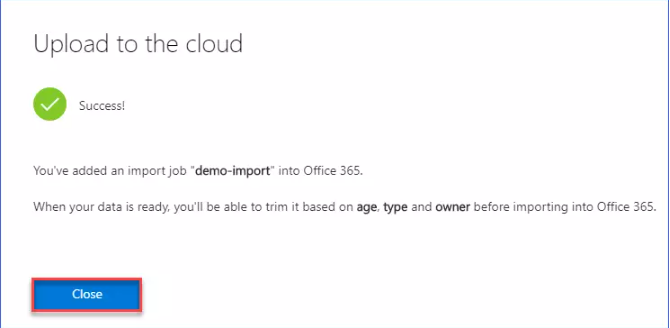
3. After clicking on Save, you will get a success status window. Click on the Close button and you will be redirected to PST Import job.
5) Completion of PST Import Job
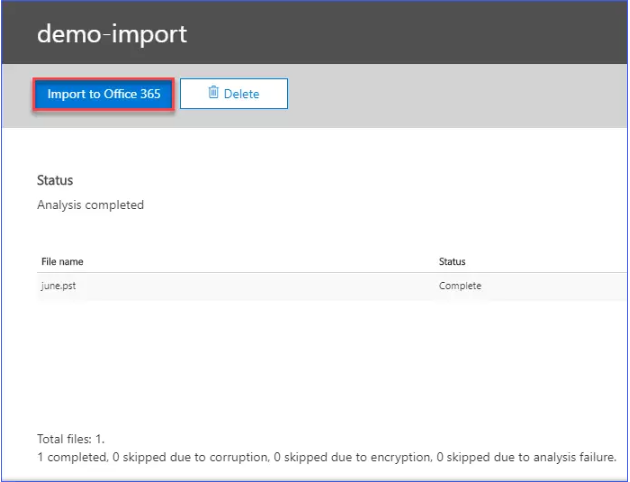
1. Let the status of job change to “Analysis Completed”. After completion click on “Ready to import to Office 365”

2. Next click on the “Import to office 365” button.
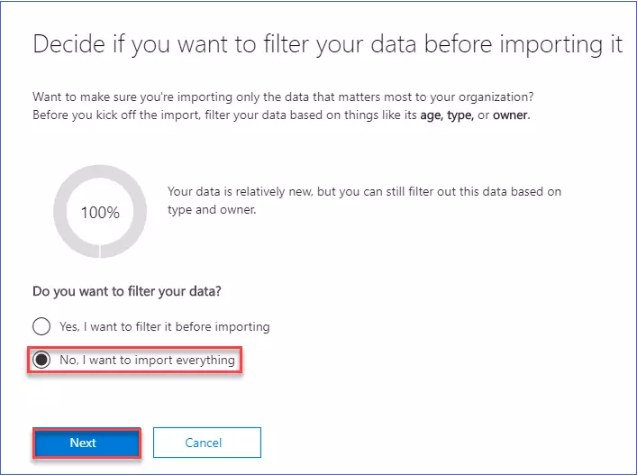
3. If you want to move all items from a PST file then choose “No, I want to import everything” as the option and then click Next.
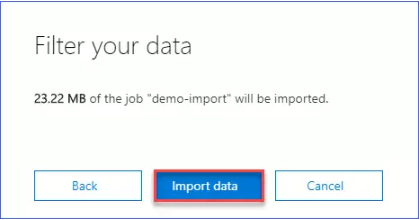
4. Now, you will receive a prompt about the data to be imported. You can simply click on the Import Data button to continue for moving email from a .pst file to your Office 365 account.
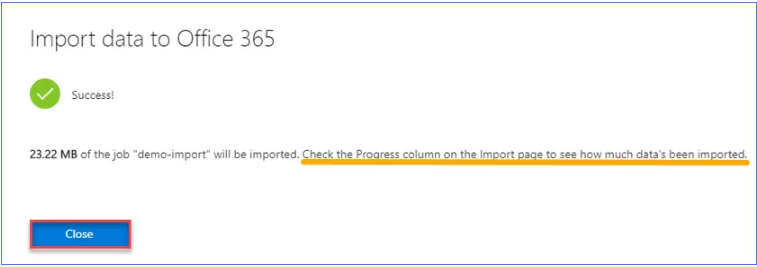
5. After that import job will begin and show the status of the data moved on the screen. After completion, you will receive a status “Successful”.
Now, go to the destination Office 365 account and check for the moved emails from a .pst file.
Conclusion
In this blog, we have provided information about the method for moving email from a .pst file to your Office 365 account with ease. In this, we have covered the free manual method, which is Network upload in depth.
In case, you find difficulty with this process you can contact Microsoft help or try alternate solutions available in the market. We recommend using Datahelp PST to Office 365 migration tool which can complete this complex task in just a Minute. These tools are way cheaper than Drive Shipping if you face trouble with Network upload then we strongly recommend you prefer an automated tool first.