How to Fix & Run CHKDSK On External Hard Drive: 2 Different Techniques


We’ll go over how to run CHKDSK on external hard drive in Windows 10 and how to utilize it to repair your hard drive in this article.
CHKDSK (pronounced “Check Disk”) is a very helpful and important tool for keeping track of the health of your hard drive. This utility does a multipass scan of a disc to ensure that it is sound and operating. Using CHKDSK to ensure that your drives are working properly is a terrific method to speed up Windows 10. We recommend that you run CHKDSK on external hard drive every few months to keep your drives safe and healthy.
Let’s Understand How Does CHKDSK Work?
Before going on to the steps for how to CHKDSK begins by scanning the disc drive’s file system and examining the drive’s files, file system, and file metadata for integrity.
When CHKDSK detects logical file system faults, it resolves them on the fly, preserving all data on the disc and ensuring that nothing is lost. Corrupted entries in the drive’s master file table (MFT), a table that tells the drive how files are connected in the murky labyrinths of the drive’s hardware, are examples of logical file system faults.
On the drive, CHKDSK additionally corrects mismatched time stamps, file size data, and security flags. After that, CHKDSK can run a full scan of the drive, accessing and testing every sector of the hardware. Hard drives are separated into logical sectors, which are predetermined sections of the disc that will hold a specific amount of data.
Soft errors, in which data has been written wrongly to the magnetic media, or hard errors, in which the drive itself has a physical flaw in the area defined as a sector, can occur in sectors. CHKDSK addresses hard mistakes by marking that section of the disc as damaged and ‘out of bounds’ for future use, and it fixes soft errors by rewriting the defective data. Because CHKDSK has been updated and upgraded with each new generation of storage technology, it continues to function properly in analyzing and repairing hard drives of all types.
The same process that was formerly used to examine a 160K floppy disc may now be used to study a 15 terabyte SSD.
Also Read: How to Fix Files Missing From External Hard Drive But Still Taking Up Space in Windows 10, 8, 7, 11
Steps for How to Run CHKDSK on External Hard Drive
- To launch the My Computer folder, double-click the icon on your desktop. You’ll notice your C drive as well as an icon for your external drive.
- Select Properties from the context menu when you right-click the external drive. A window called Properties will appear.
- Tools and Check Now are the two options. If you’re running Vista, a User Account Control box will show if you click Continue. The Check Disk window will appear, with options to choose from.
- If you want Windows to automatically resolve file system issues, select the Check box next to it.
- For Windows to conduct that action, choose the check box next to Scan for and attempt recover of bad sectors.
- Start should be selected. Windows will do a check for faults on the external hard disc. The status of the check will be displayed in the Check Disk window once it has been completed. To close the window, click Close.
For Windows 7, the Check Now option under the Properties >> Tool will give you two more options: one to automatically fix the file system, and the other to check for and try to recover faulty sectors. Select the Start option to begin the scanning process.
If your disc has a problem, Windows will be unable to run this scan.
Run CHKDSK on External Hard Drive Using Command Prompt
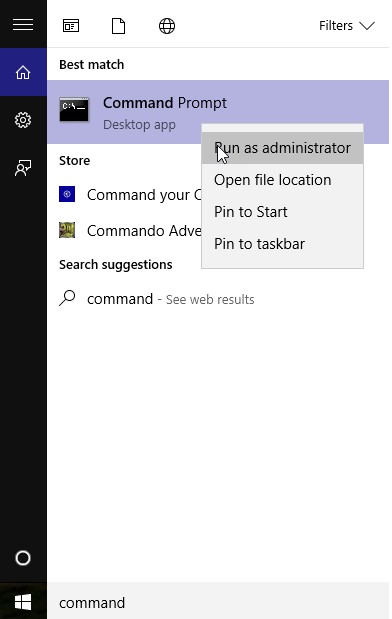
You’ll need administrative access to perform the CHKDSK command on an external hard drive. So, press the Start button, type Command Prompt, and select Run as administrator.
The Administrator Command Prompt will now be shown on your computer. Now type the following command: E: /f chkdsk
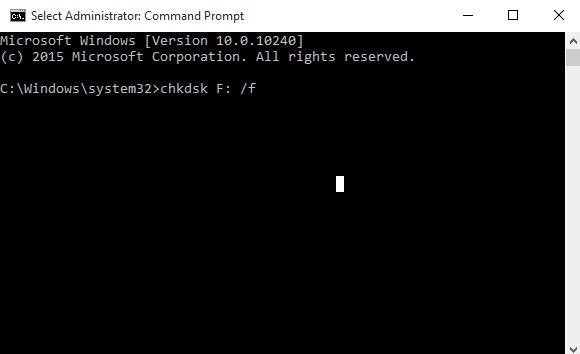
Note: You can change the name of the disc F: to the name of the external hard drive you want to scan. chkdsk [Drive:] [parameters] is the format.
See Repair Commands with Chkdsk:
/f – to fix disc faults on a hard drive
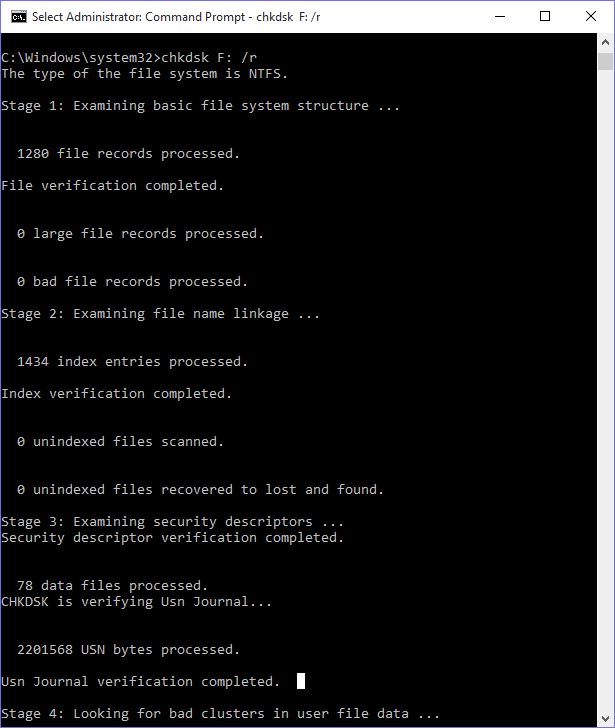
/r – locates faulty sectors on the hard drive
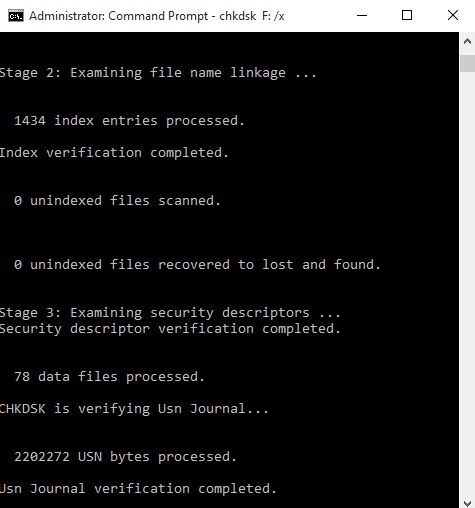
/x – Forces the drive to dismount before performing a disc inspection.
If there are no problems with the external disc, the command chkdsk F: /f will return the following result.

If the command chkdsk F: /r does not find any faulty sectors on the external disc, the output will be as follows.
Before doing a disc check, use the command chkdsk F: /x to force the external drive to dismount.
Run CHKDSK on External Hard Drive by Expert Solution
Have you tried running CHKDSK on external hard drive that isn’t connected to the computer? If the task is tough to complete or does not assist you in resolving the issues with your drive. The best solution is to rely on trusted and dependable third-party software. The only solution that can be advised when evaluating an efficient application to resolve issues in Hard Drive without losing data is DataHelp Hard Drive Data Recovery Software. It is one of the best applications for recovering and repairing corrupted data on a hard disc currently accessible on the market. While using the software, it provides a 100 percent guarantee of data security.
Download for Windows Purchase Now
Final Words
On Windows systems, CHKDSK is a very effective tool for scanning and correcting hard discs. You may use this handy feature to optimize your PC’s performance and address issues with your disc by following the procedures indicated above. The blog presents two approaches for efficiently running CHKDSK on a hard drive. In the event that the manual CHKDSK approach fails to effectively cure the faults in the external hard drive. We also recommend an alternative method. Go over the steps in the blog and make sure you understand them.