How to Create Shared Mailbox in Office 365? Perfectly Explained


Summary: Are you looking for an easy solution to create shared mailbox in Office 365? If your answer is yes, then your search would end here. In this article, we are describing three different techniques to create a shared mailbox in Office 365.
You can use any of these three techniques accordingly. But first, let’s have a quick glance at Office 365 shared mailboxes.
What is Office 365 Shared Mailbox? Idea Behind Office 365 Shared Mailbox
Different Methods to Create Shared Mailbox in Office 365
Approach 1: Create Shared Mailbox Using Microsoft 365 Admin Center
Approach 2: Create Shared Mailbox in Office 365 Using Exchange Admin Center
Approach 3: Create Shared Mailbox in Office 365 via Powershell Command
What is Office 365 Shared Mailbox? Idea Behind Office 365 Shared Mailbox
A shared mailbox is a functional mailbox that makes it easy for a number of users to manage and send emails from a common account. This type of mailbox is free and requires a license above 50 GB of storage.
Also, there is no username and password for shared mailboxes and users are unable to sign in to it directly. Generally, they are created in organizations to permit access by different users like the HR department, Sales department, etc.
After understanding the Office 365 shared mailboxes, it’s time to know how to create it.
Different Methods to Create Shared Mailbox in Office 365
Generally, there are three ways that use to generate shared mailboxes in Office 365. All of them are discussed below-
Approach 1: How to Create Shared Mailbox Using Microsoft 365 Admin Center
Use the below instructions, to perform this task using the O365 admin center.
1. First of all, log in to the Office 365 account.
2. Click on Admin under the Apps section as shown in the screenshot.

3. Once the Admin panel opens, go to Groups and click on Shared mailboxes from the left-side navigation pane.

4. After that, click on +Add a mailbox in order to open the New shared mailbox window.
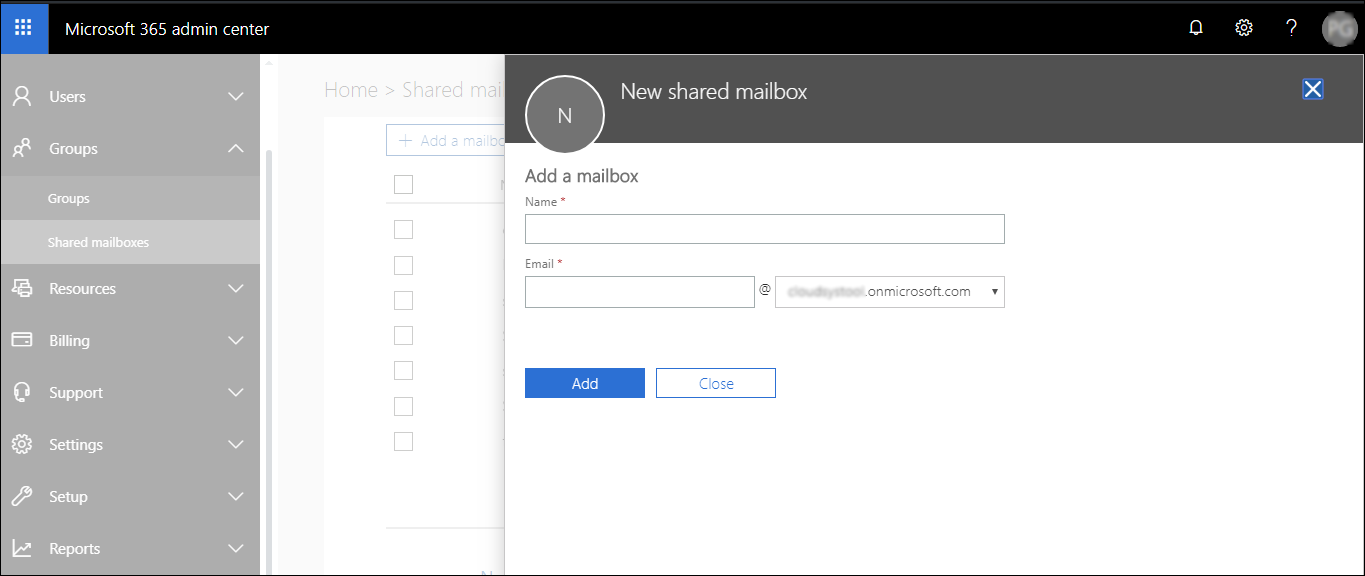
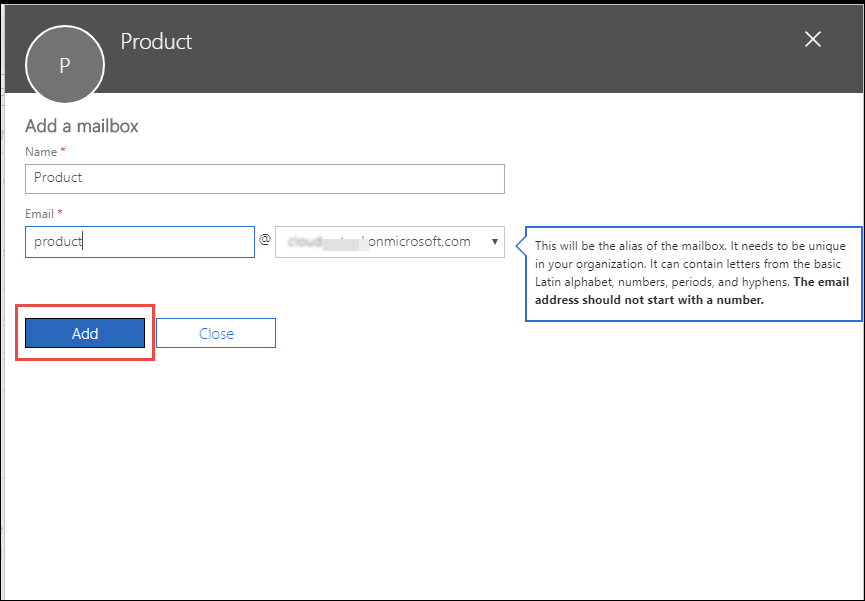
5. Provide name and email ID for shared mailboxes in the respective Name and Email address box. Then, click on Add.
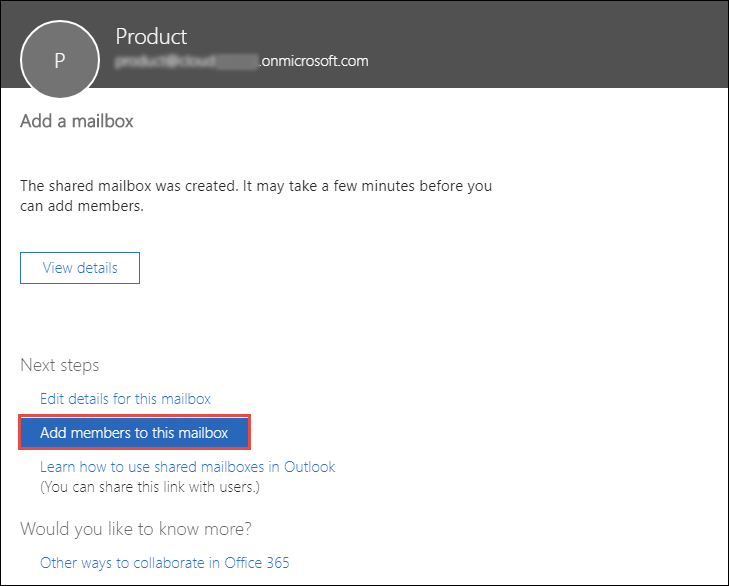
6. In a few minutes, a new shared mailbox will be created in the Office 365 account. Afterward, you can click on Add members to this mailbox option to add a user to it.
Approach 2: Create Shared Mailbox in Microsoft 365 Using Exchange Admin Center
1. Use https://outlook.office365.com/ecp in order to open EAC.
2. After that, log in to the O365 account.
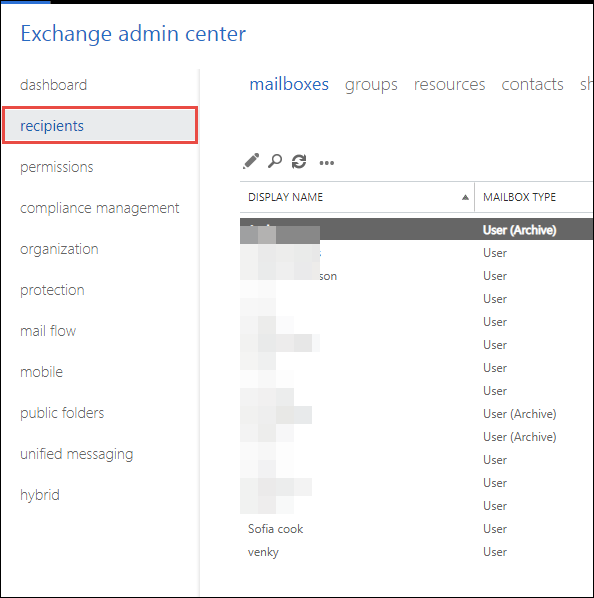
3. Once the Exchange admin center window opens, select the recipients to open its screen.
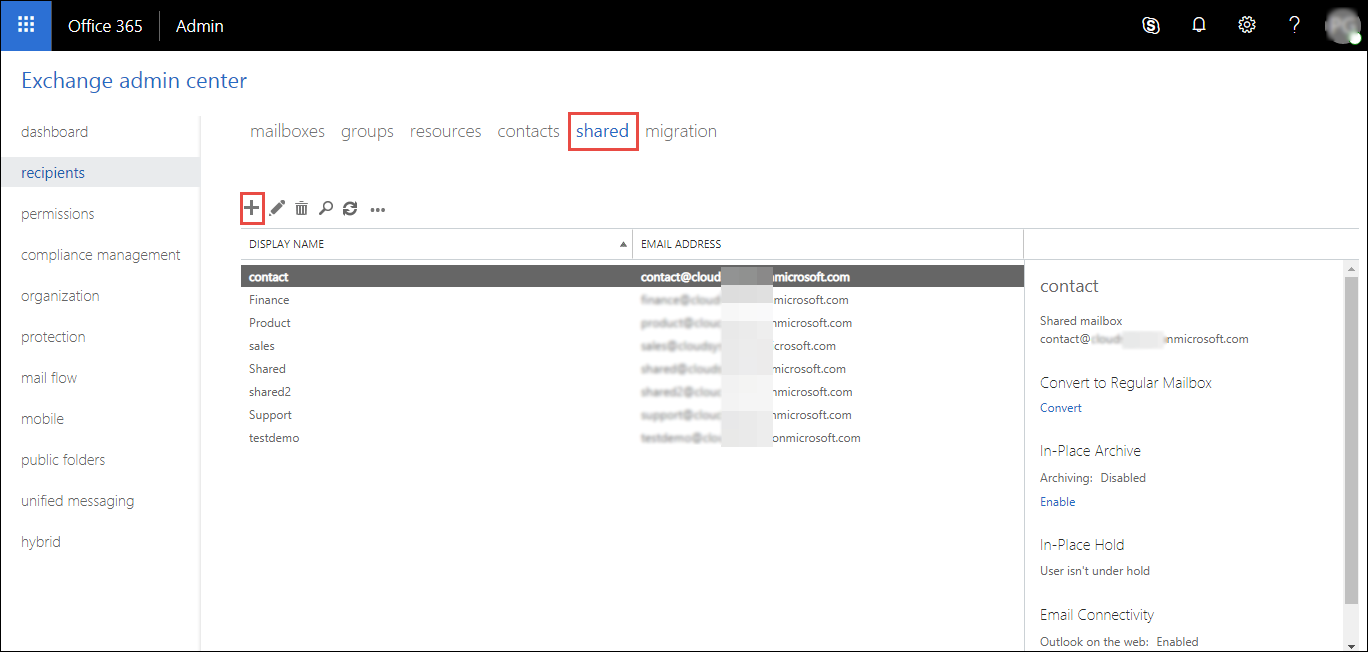
4. Now, click on the shared option and click on ‘+’ to create shared mailbox in Office 365.
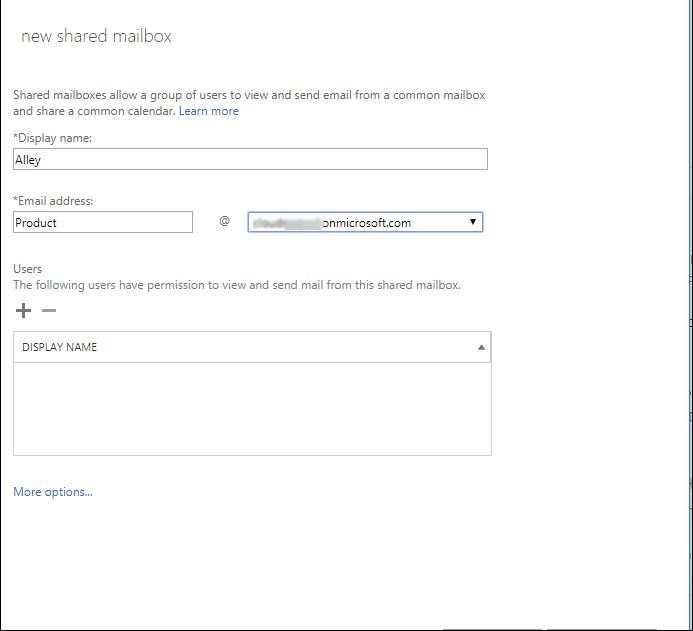
5. In the New Shared Mailbox window, enter a suitable name for the mailbox under the Display Name box. After that, provide an email ID under the Email address box.
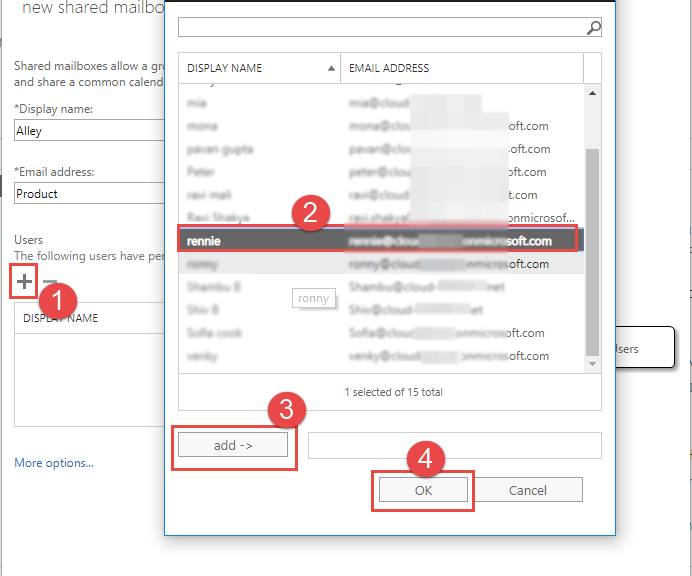
6. Next, to add the member, click on ‘+’ and select the user. Afterward, click on Add >> OK.
7. At last, click on Save to generate the shared mailbox.
Must Read: If you want to migrate shared mailbox to Office 365, then read this article to learn the best way. Step by step proceedure is explained in this guide for the same operation.
Approach 3: Create Office 365 Shared Mailbox via Powershell Command
The Office 365 shared mailboxes can be easily created by using the PowerShell command. One can only need to follow the below instruction carefully. Because a single mistake in the cmdlet can result in severe problems.
- Initially, you need to establish a connection between Exchange Online and the PowerShell session.
- After that, use the New-Mailbox command to create shared mailboxes.
New-Mailbox -Shared -Name "Shared_Mailbox_Name" -PrimarySmtpAddress “Shared_Mailbox_Email_Address” - Next, assign permission to a user in order to access the shared mailbox.
Add-MailboxPermission -Identity "Name_of_Shared_Mailbox" -User Office365_User_Email_Address -AccessRights FullAccess - Now, you need to provide SendAs permission to let the user or group members to send emails that come from the specific mailbox, mail user, etc. For this, execute the below cmdlet.
Add-RecipientPermission -Identity "Shared_Mailbox_Name" -Trustee Office 365_User_Email_Address -AccessRights SendAs
After understanding how to create a Office 365 shared mailbox, using three different approaches. There are possibilities in future that you might need to know, how to convert user mailbox to shared mailbox or shared mailbox to user mailbox in Office 365, then you can also check this article.
Bringing It All Together
Office 365 shared mailbox is not an ordinary primary mailbox, it is more than that. In fact, every organization needs that type of functionality.
Therefore, in this article, we have discussed how to create shared mailbox in Office 365 using three different methods. It is suggested to use the first two methods for the same because the PowerShell method is a little bit complex.